Payment Gateway Configuration
Configure the payment methods accepted by your system. We support several popular options.
Razorpay
Razorpay is a popular payment solution in India allowing businesses to accept, process, and disburse payments. It supports various modes like credit/debit cards, netbanking, UPI, and wallets.
Account Setup
- If you have an existing Razorpay Developer Account: Log in here.
- If you need a new account: Sign up for a business account.
Obtaining API Keys
Follow these steps to get your API keys from the Razorpay dashboard:
- Log in to your Razorpay Dashboard.
- Navigate to the Settings section, usually found in the sidebar.
- Select the API Keys tab.
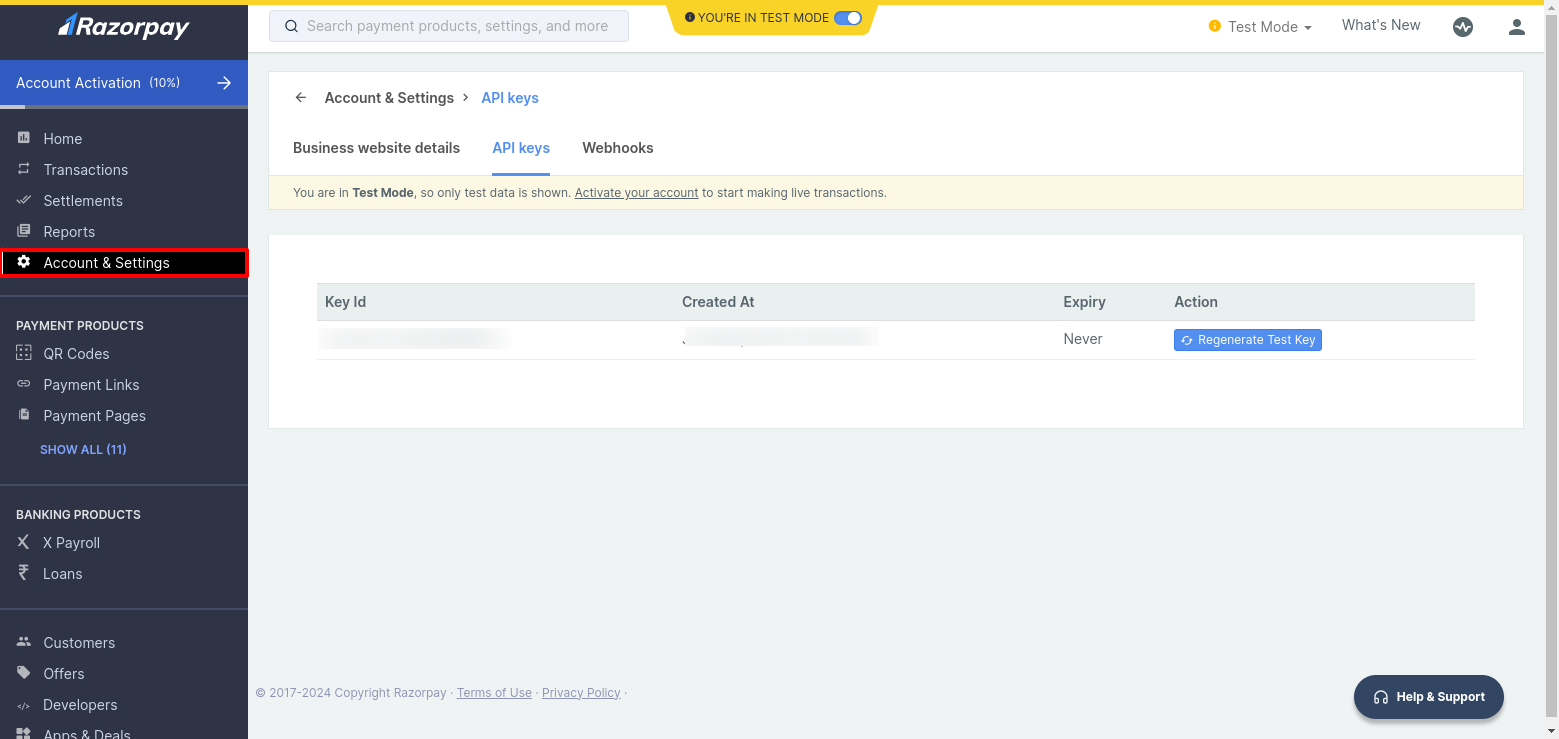
- Click on Regenerate Test Key (for testing) or Regenerate Live Key (for production).
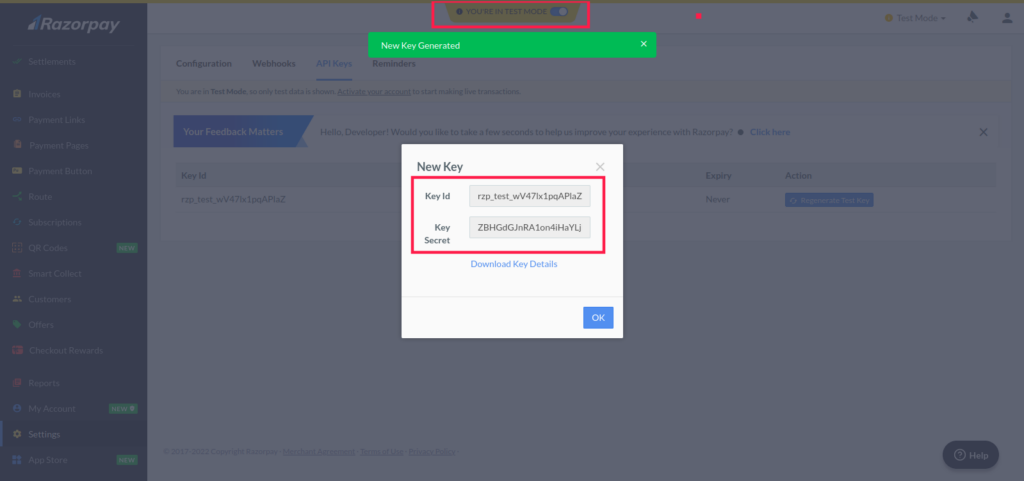
- A confirmation dialog will appear. Confirm the regeneration.
- A new dialog will display your Key ID and Key Secret. Copy
these values immediately and store them securely. The Key Secret will not be shown again.
- A new dialog will display your Key ID and Key Secret. Copy
these values immediately and store them securely. The Key Secret will not be shown again.
- Go to restaurant admin => go to Setting page => then go to payment methods
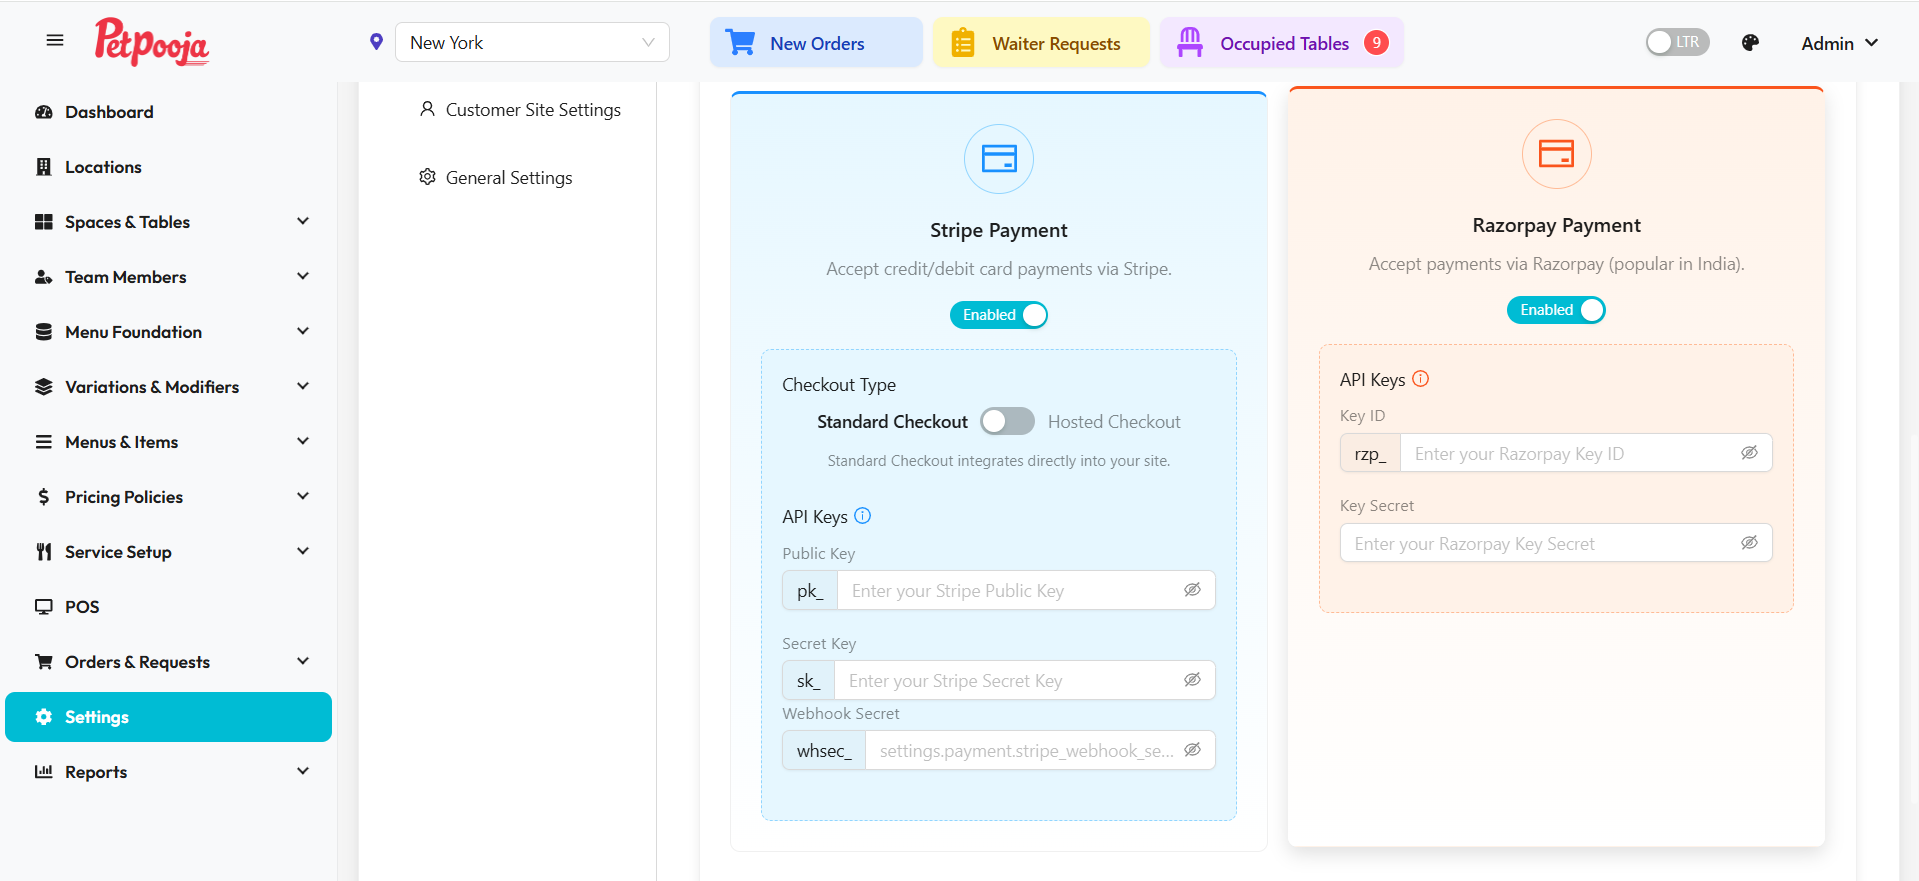
Once you have your Key ID and Key Secret, enter them into the corresponding fields in your system's payment settings.
Configuring Webhooks
Webhooks allow Razorpay to send real-time payment notifications to your application. Follow these steps to set up webhooks:
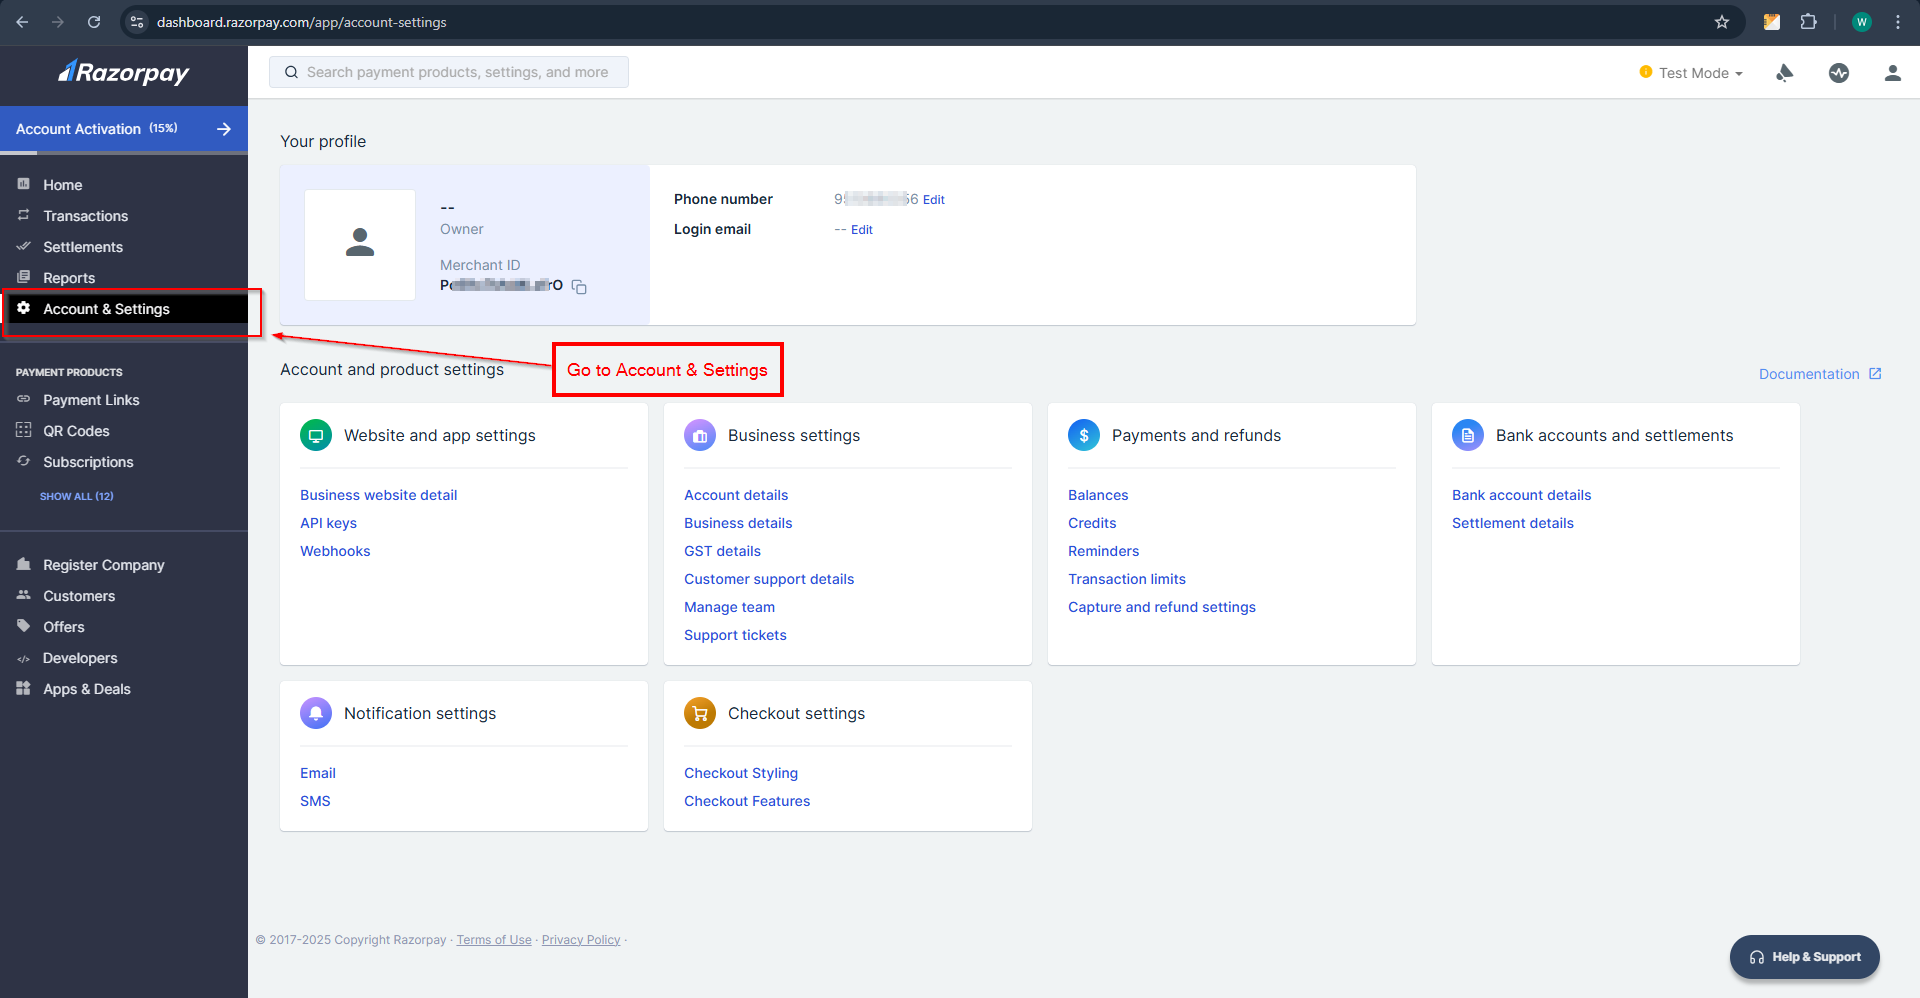
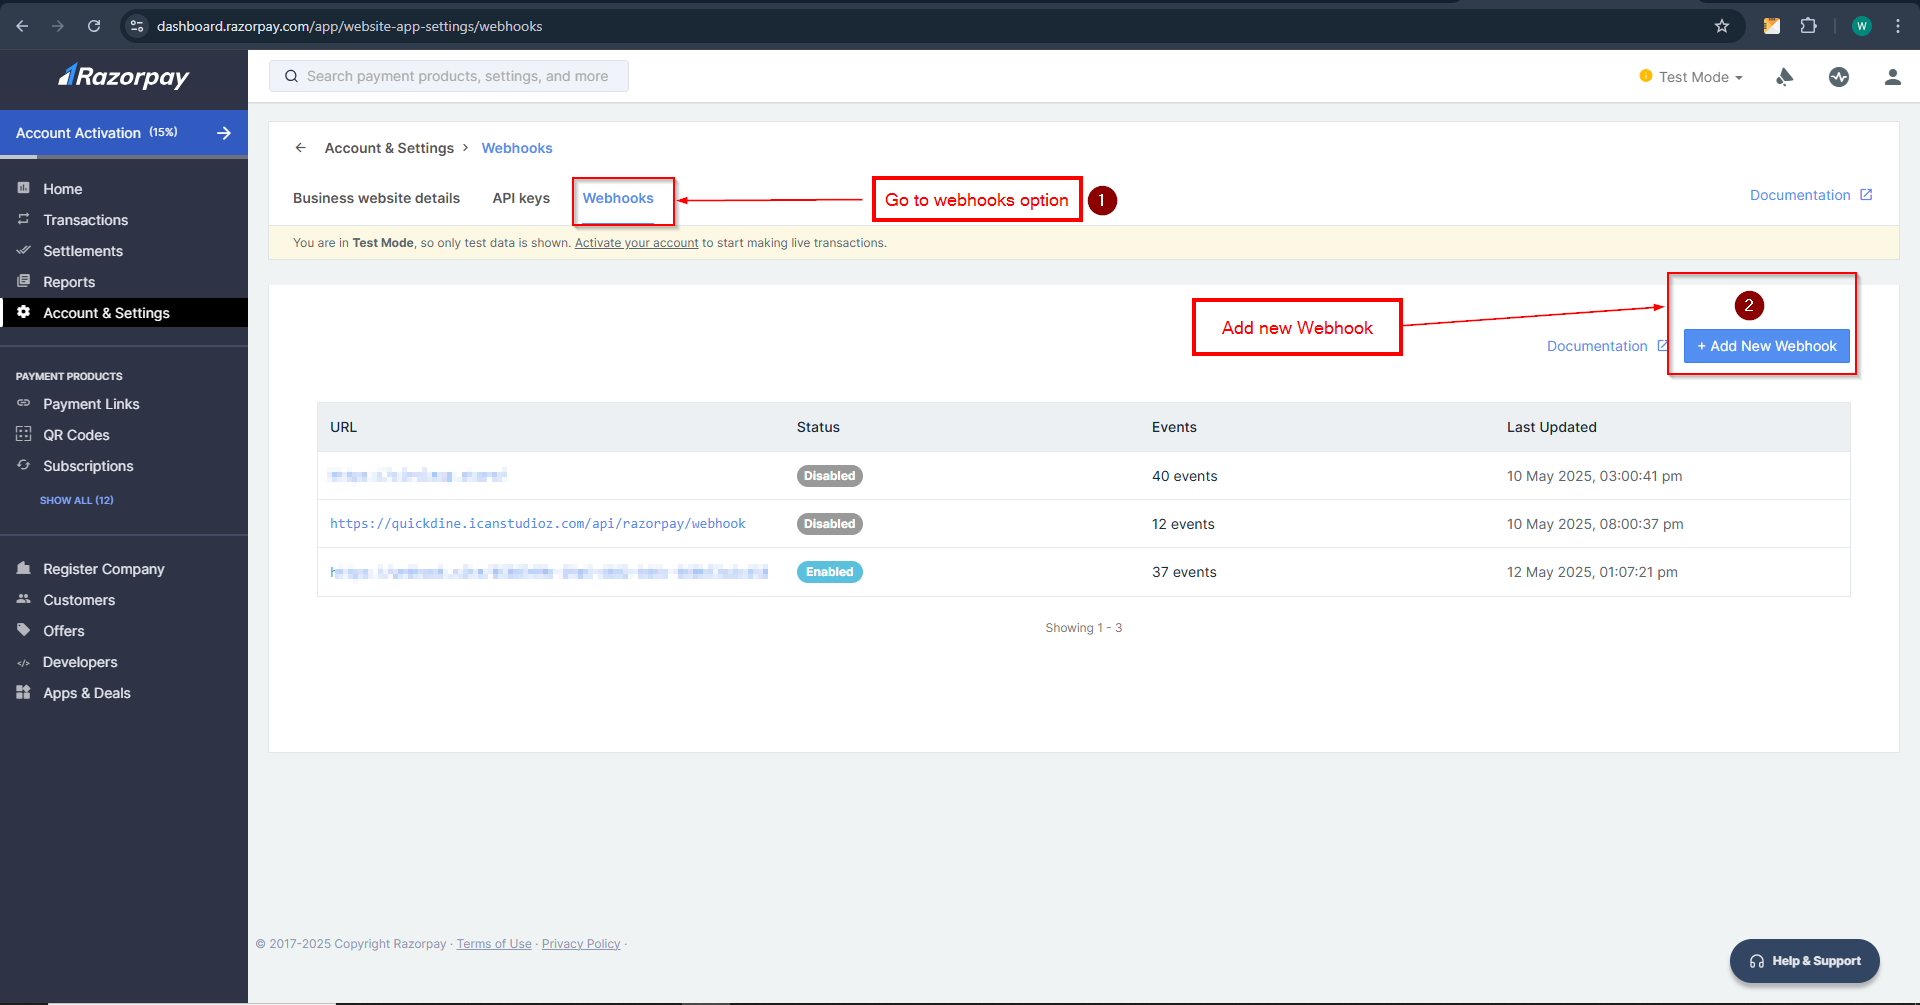
- Log in to your Razorpay Dashboard.
- Click on your profile name in the top right corner, then select Account &
Settings.
- In the left sidebar, select Webhooks, then click on Add New
Webhook.
- Configure your webhook with the following settings:
- URL to notify: Enter your application's webhook endpoint (e.g., https://yourdomain.com/webhook/razorpay)
- Secret: Create a strong, unique secret key
- Active: Toggle this to enable the webhook
- Events to send: Select all payment-related events (at minimum: payment.authorized, payment.captured, payment.failed)
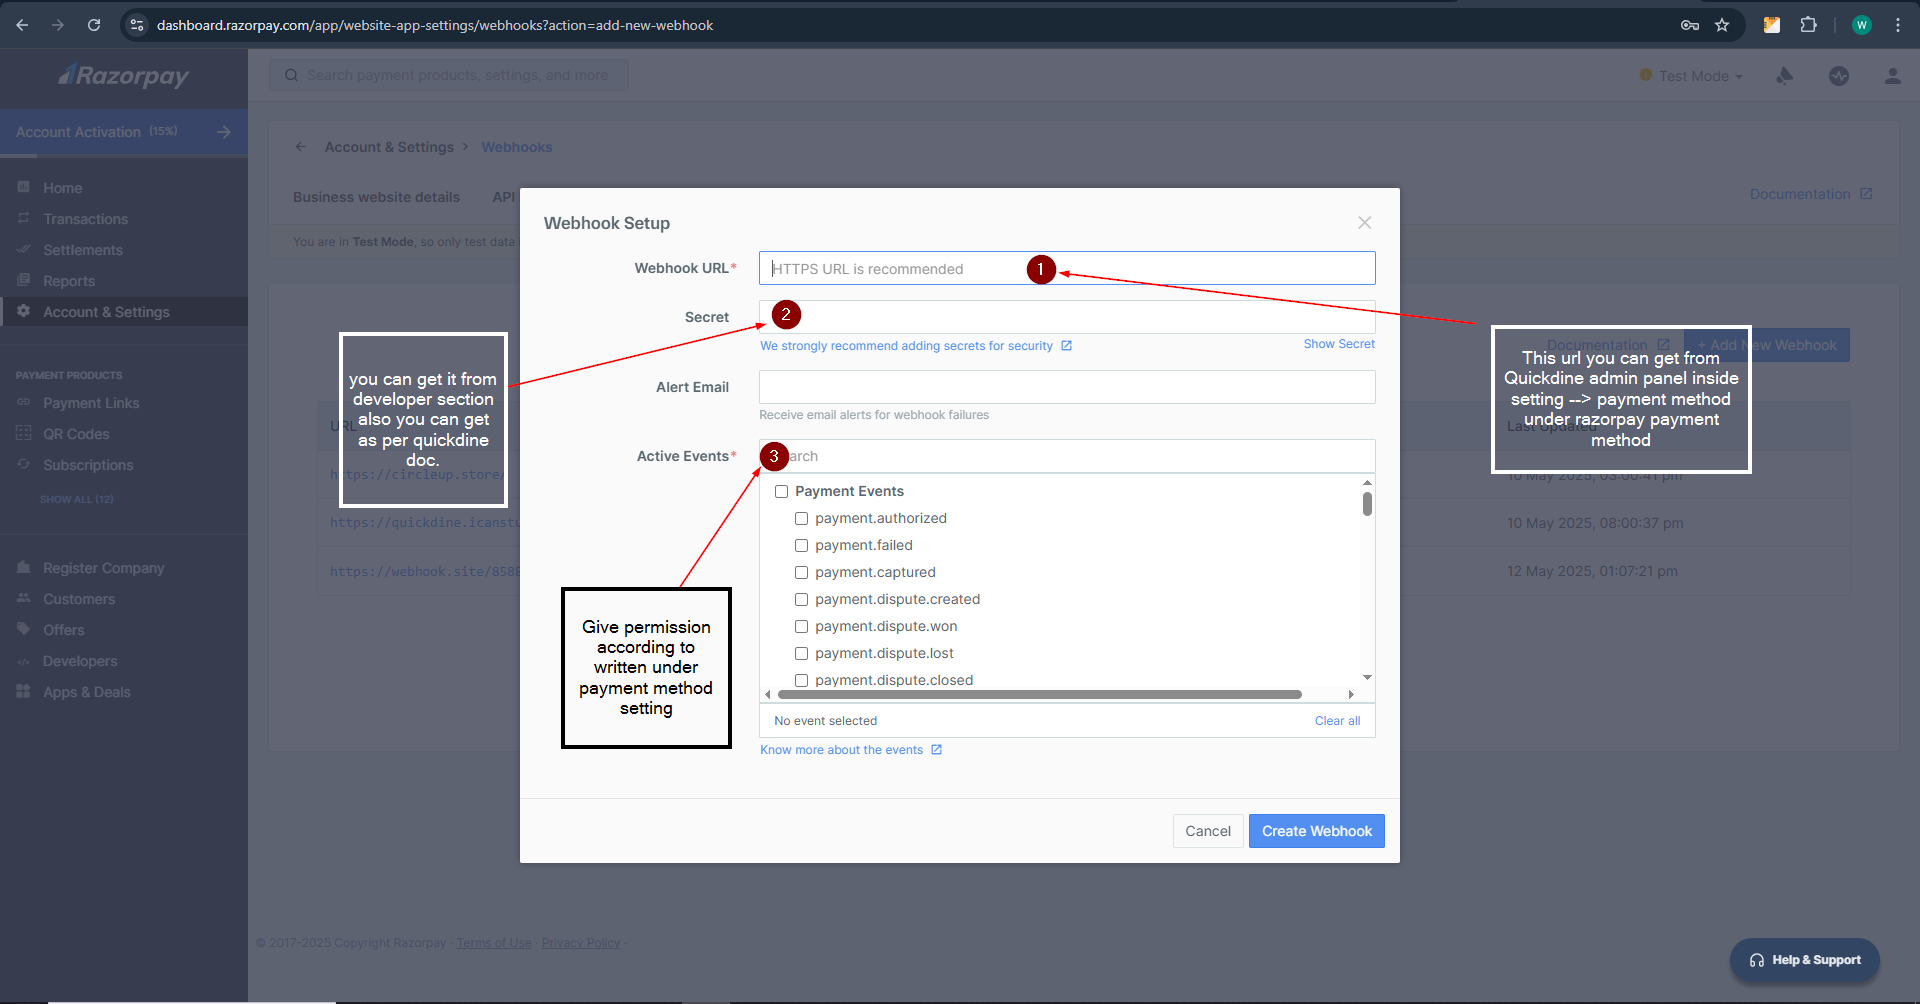
- Click Create Webhook to save your settings.
- Copy the webhook secret and add it to your application's Razorpay configuration.
After configuring webhooks, your system will receive automatic payment status updates, allowing for better order management and customer experience.
Stripe
Stripe is a global payment processor supporting a wide range of payment methods.
Account Setup & API Keys
- Sign up or log in at Stripe Dashboard.
- Navigate to the Developers section.
- Go to the API Keys page.
- Find your Publishable key and Secret key. Use the test keys for development/testing and live keys for production.
- Copy these keys into your system's Stripe configuration settings as shown in the image above.
- Configure the checkout type (Standard or Hosted) based on your integration needs.
- Enter your webhook secret if you're using webhooks for payment notifications.
Ensure you also configure webhooks in Stripe for reliable payment status updates.
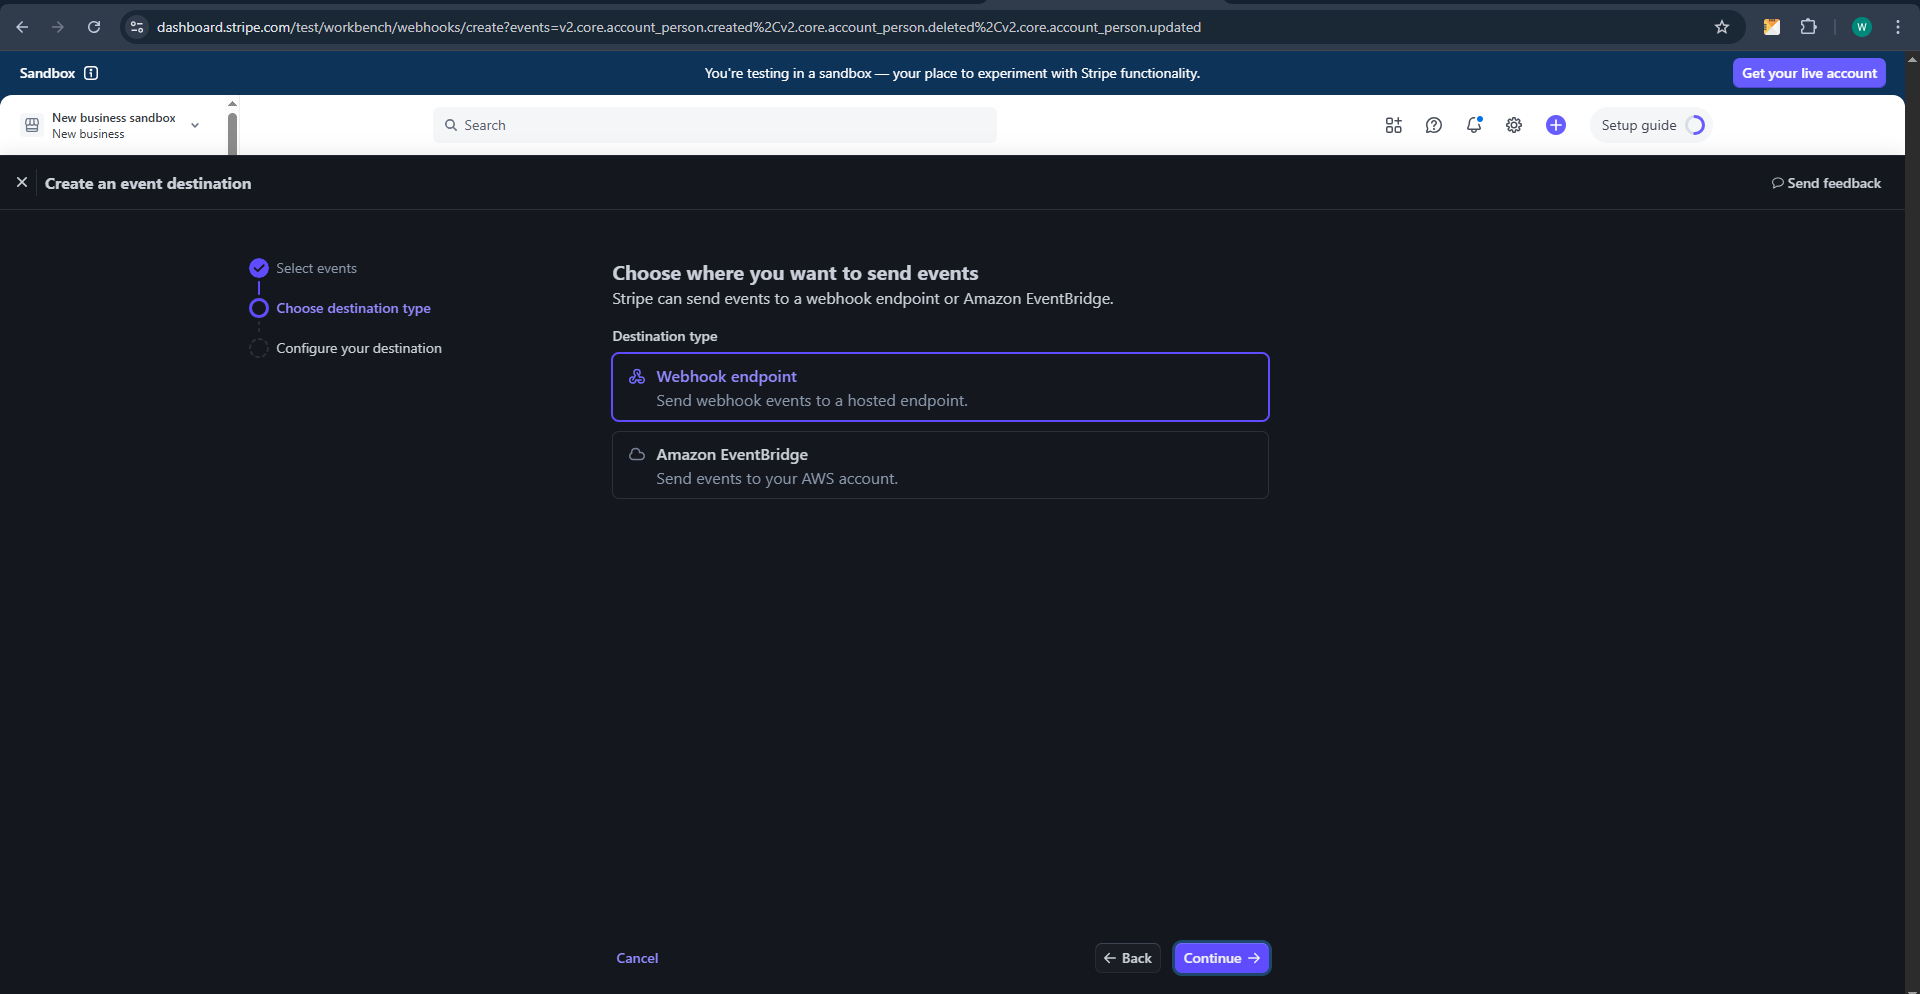
Configuring Stripe Webhooks
Webhooks are essential for receiving real-time payment notifications from Stripe. Follow these steps to set up webhooks:
- In your Stripe Dashboard, go to the Developers section and select
Webhooks.
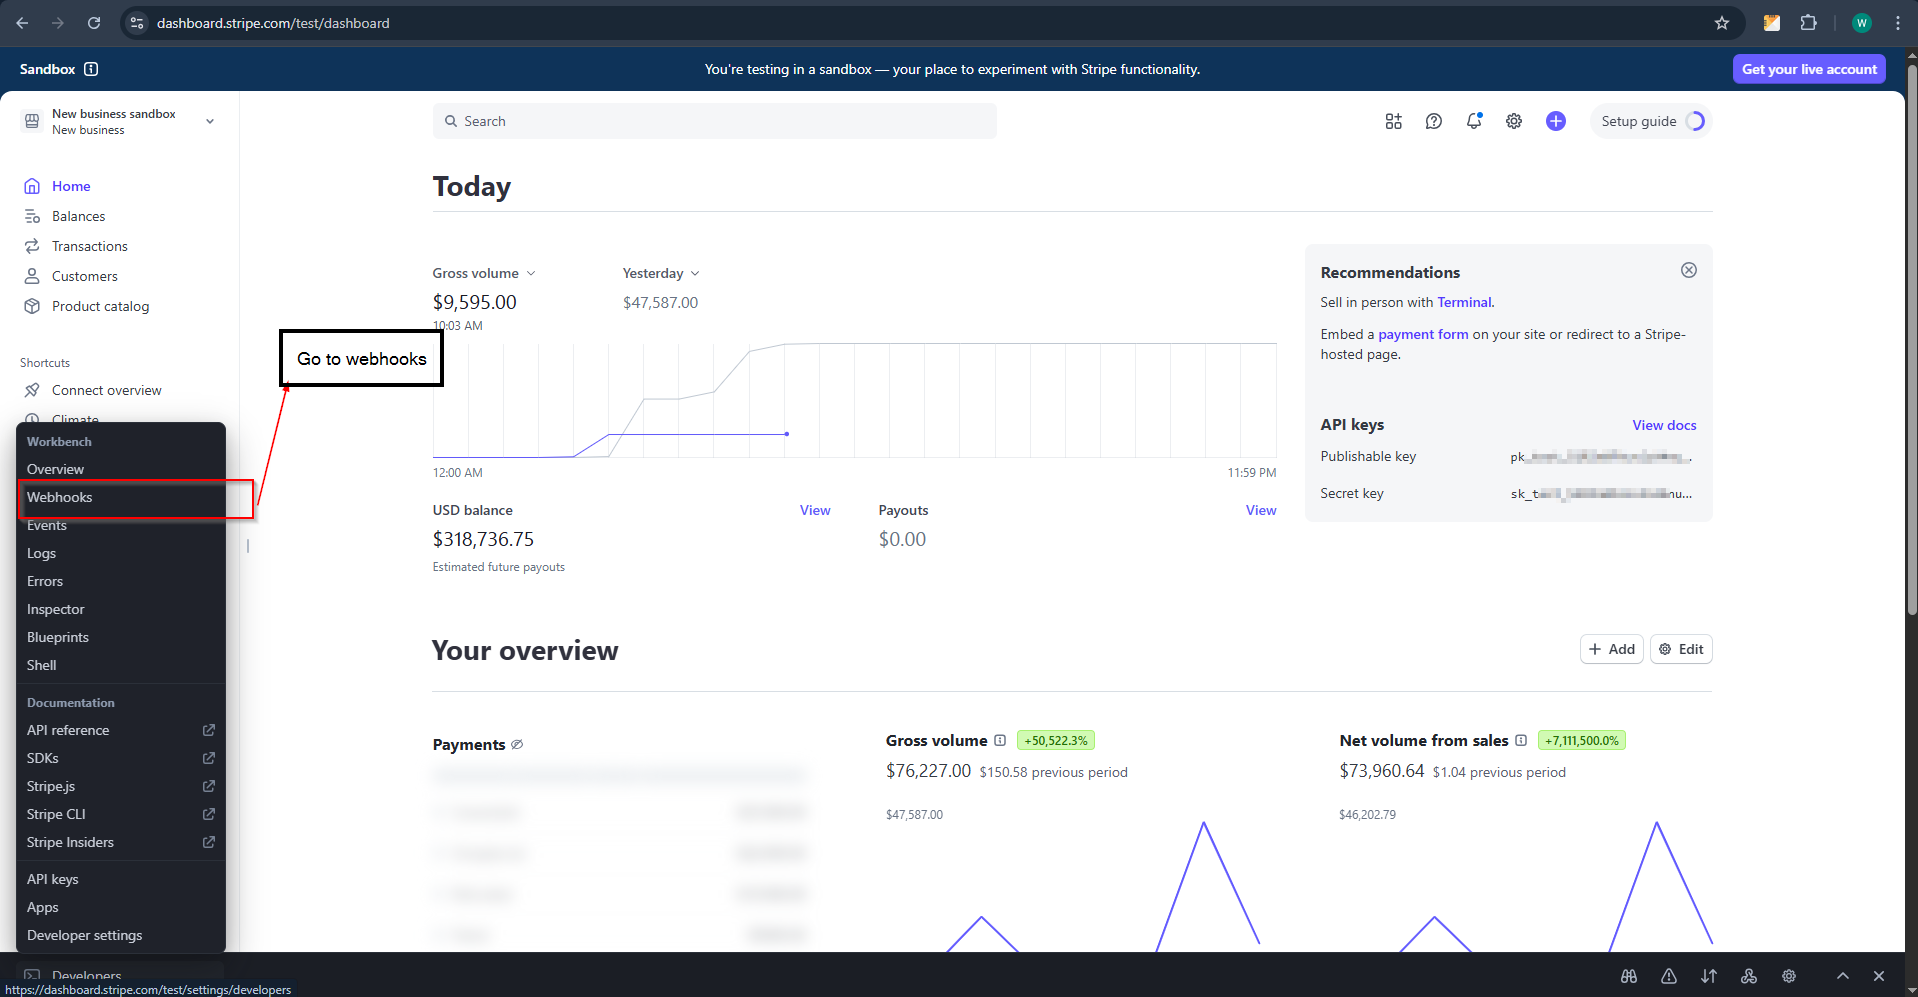
- Click Add endpoint to create a new webhook.
- For the endpoint URL, you'll need to use the webhook URL from your QuickDine settings:

- Select the events you want to receive notifications for. At minimum, you should select:
- checkout.session.completed
- payment_intent.succeeded
- payment_intent.payment_failed
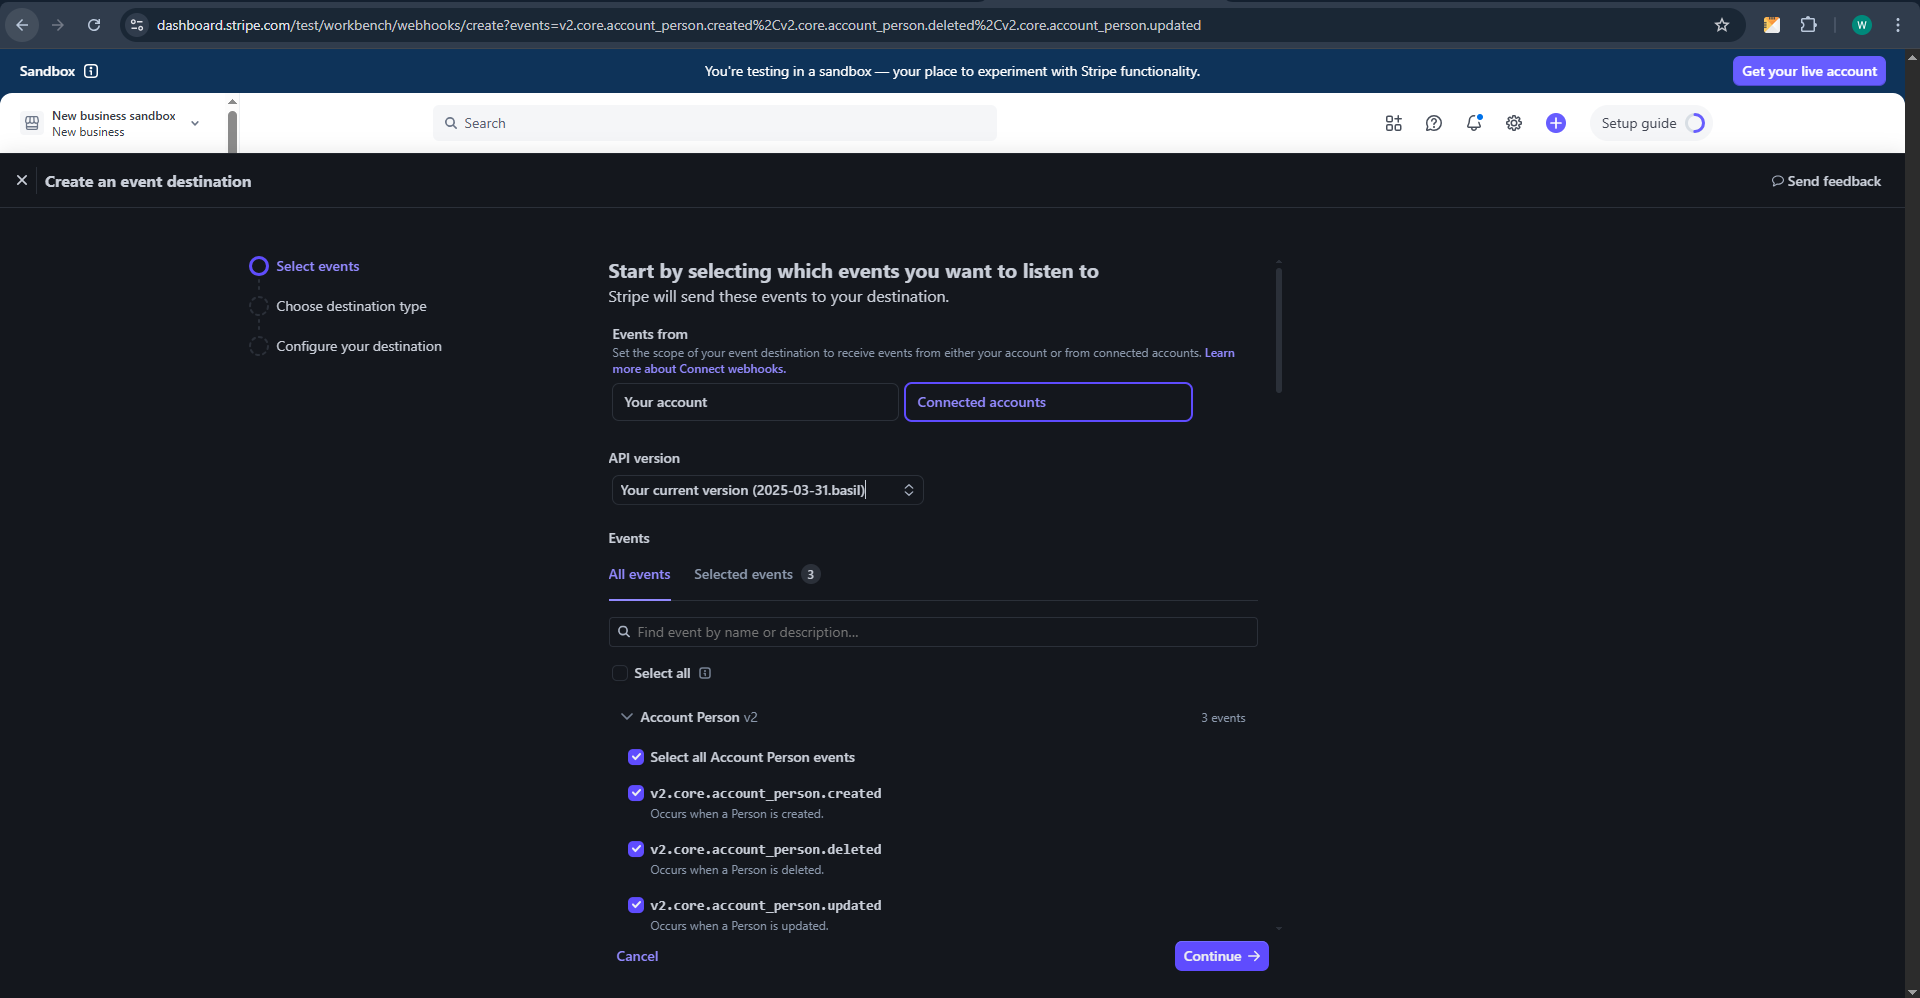
- Choose your webhook endpoint version and additional options:
- Click Add endpoint to create your webhook.
- After creation, Stripe will provide a Signing Secret. Copy this value and paste it into the Webhook Secret field in your QuickDine Stripe payment settings.
With webhooks properly configured, your system will automatically receive and process payment status updates from Stripe, enabling seamless order management.
Cash
Enable this option if you accept cash payments directly (e.g., for in-person orders or cash-on-delivery).
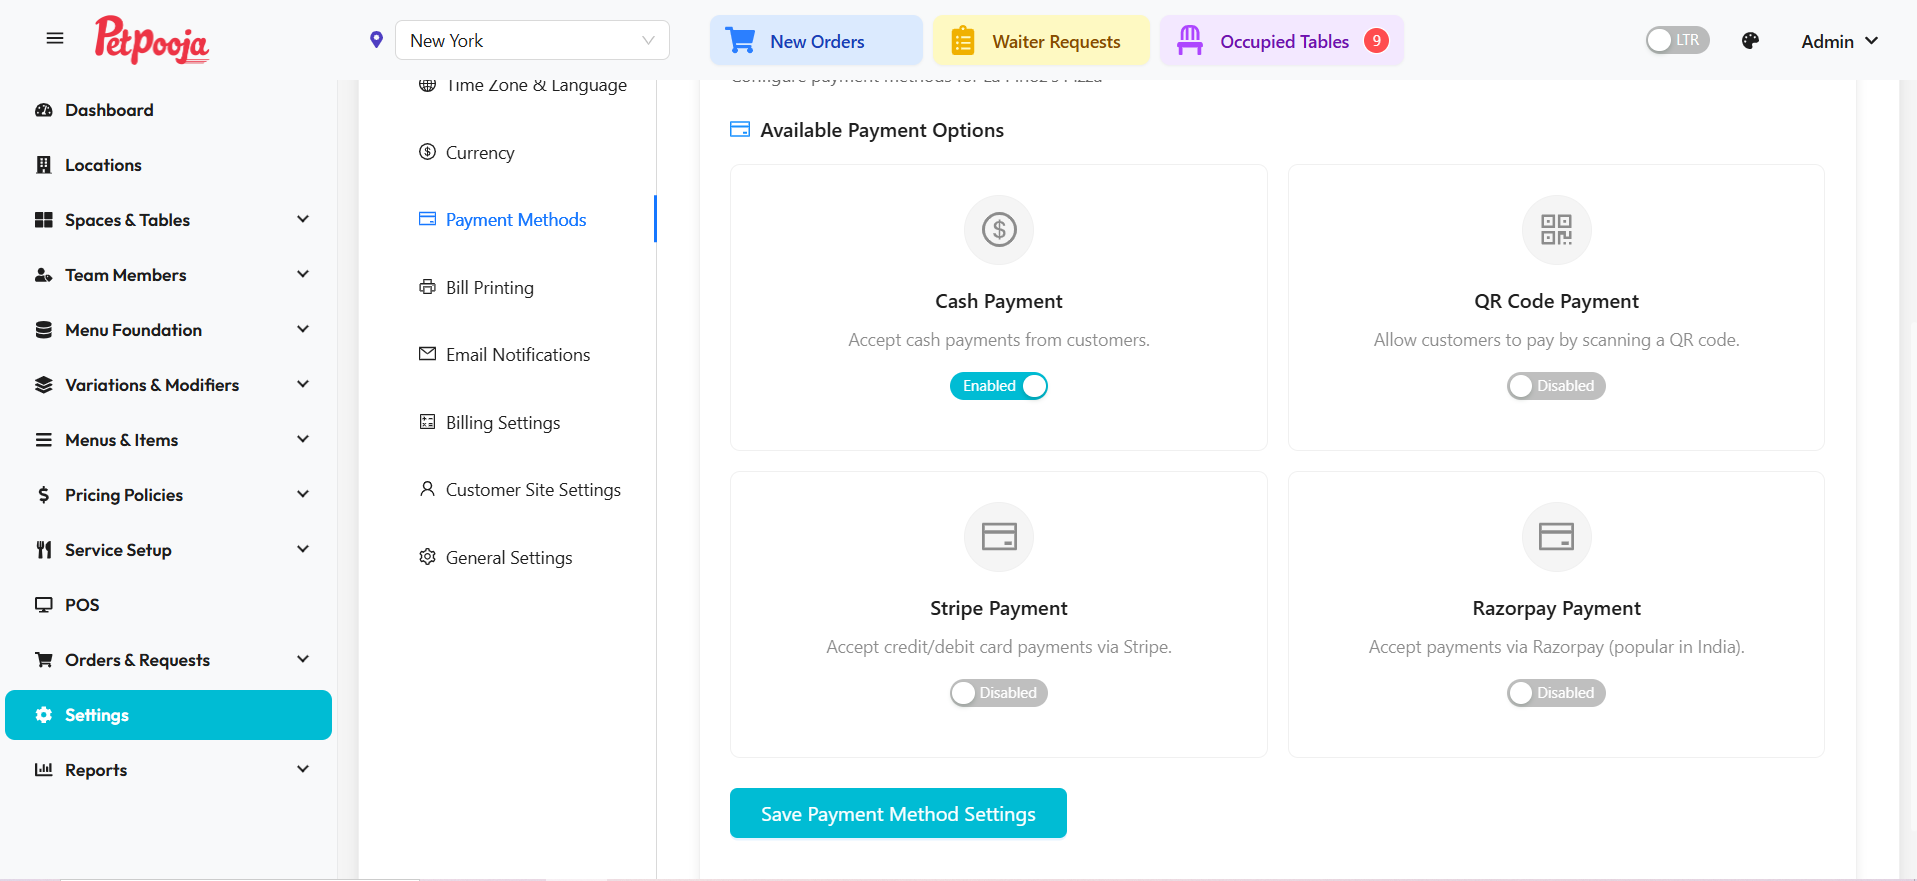
Configuration
- Navigate to your system's payment settings as shown above.
- Find the 'Cash Payment' option.
- Toggle the switch to 'Enabled' to accept cash payments.
- Save your settings using the button at the bottom of the page.
- Optionally configure any related settings, such as specific instructions for staff or limitations.
UPI / QR Code
Allow customers to pay using UPI apps or by scanning a QR code. This often integrates with a payment gateway like Razorpay or Stripe, or can be set up independently if you have a static UPI QR code.
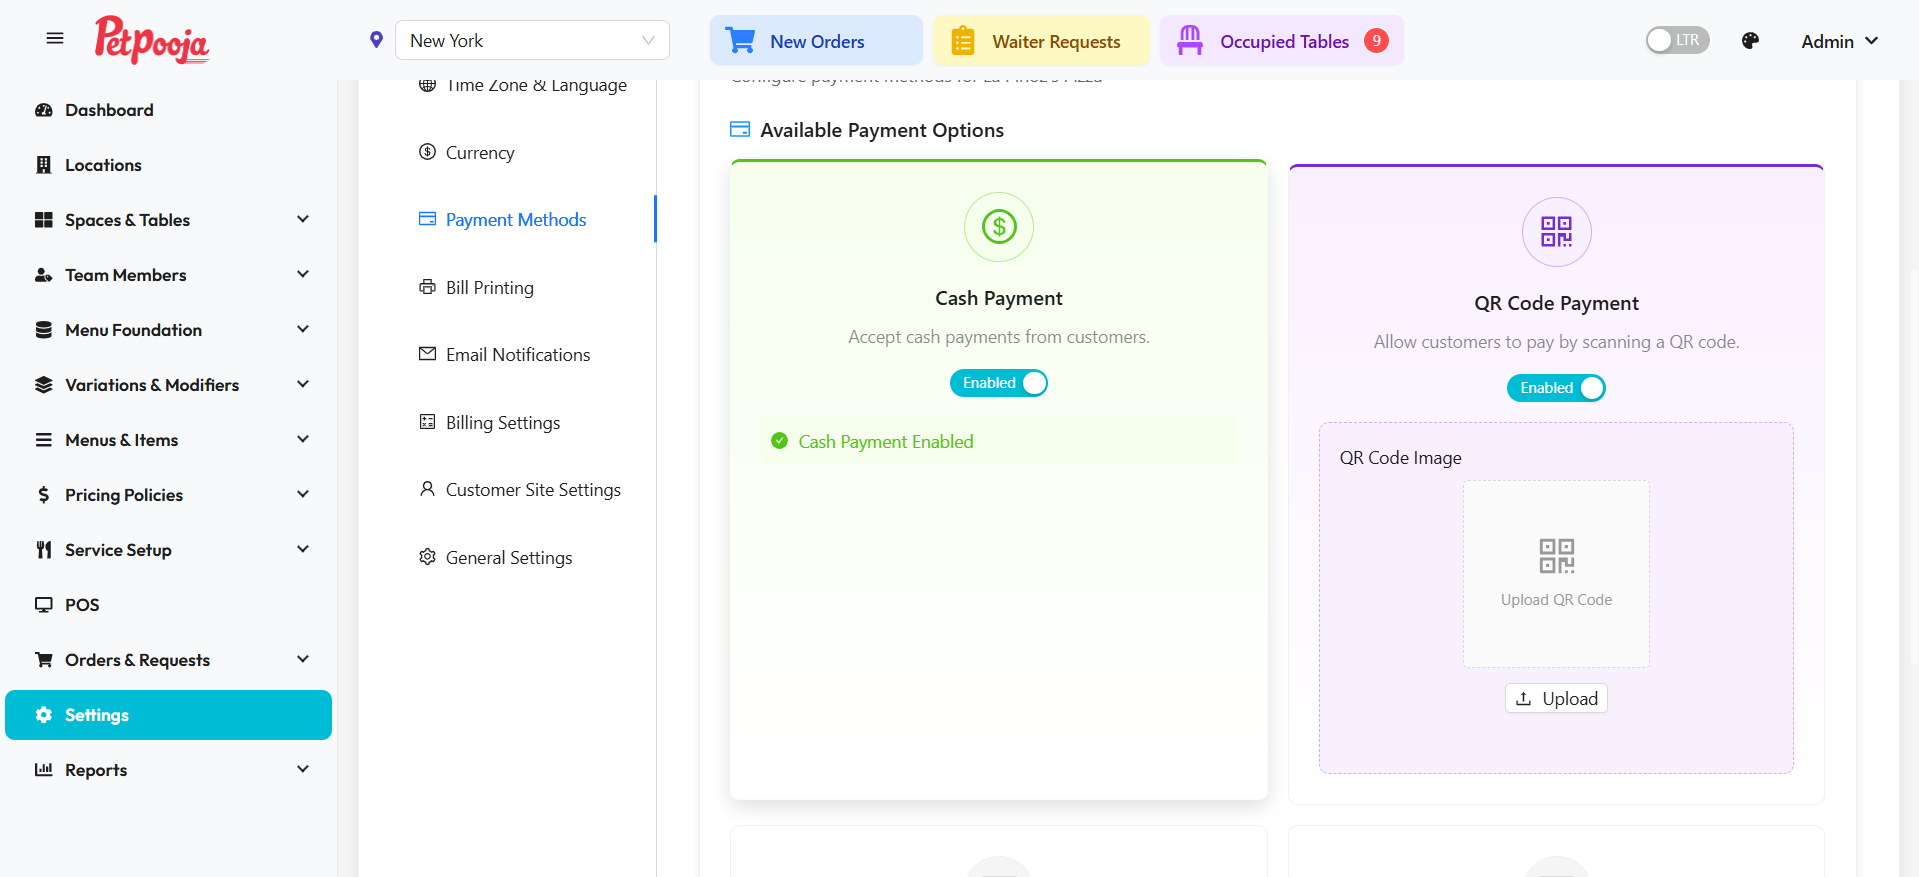
Configuration (via Gateway)
- Ensure UPI is enabled within your chosen payment gateway's settings (e.g., Razorpay or Stripe).
- Toggle the QR Code Payment option to 'Enabled' as shown in the image above.
- The gateway will typically handle the QR code generation and payment confirmation automatically during checkout.
Configuration (Static QR Code)
- Generate a static UPI QR code linked to your business bank account using your bank's app or a third-party service.
- In your system's payment settings, enable the 'QR Code Payment' option shown above.
- Click the 'Upload' button to upload your generated QR code image.
- Save your settings using the button at the bottom of the page.
- Provide instructions for customers on how to complete the payment and how staff should verify it (as static QR payments might not automatically update order status).