
AI Menu Settings
OpenAI Settings
OpenAI provides powerful AI models like ChatGPT and GPT-4 that can enhance your menu with intelligent descriptions and suggestions. Follow these steps to integrate OpenAI with QuickDine:
-
1
Sign up or sign in to OpenAI: Visit https://platform.openai.com and create an account or sign in to your
existing OpenAI account.

OpenAI platform sign up/sign in page
-
2
Access the OpenAI Dashboard: Once signed in, you'll be directed to the OpenAI
dashboard where you can manage your API keys and settings.

Navigate to the OpenAI dashboard
-
3
Create a new API key: In the OpenAI dashboard, navigate to the API keys section and
click on "Create new secret key" to generate a new API key for your QuickDine integration.

Go to API keys section and click on "Create new secret key"
-
4
Name your API key: Give your API key a descriptive name (e.g., "QuickDine
Integration") to help you identify its purpose later on.

Enter a name for your new API key
-
5
Copy and save your API key: After creating the key, OpenAI will display your new
API key. Make sure to copy this key and store it in a secure location as it will only be shown once.

Copy and securely store your generated API key
-
6
Configure OpenAI in QuickDine: In your QuickDine admin panel, navigate to the AI
Settings section. Paste your OpenAI API key in the appropriate field, toggle the "Enable OpenAI"
option, and select your preferred model (ChatGPT, GPT-4, etc.).

Enter your API key in QuickDine, enable OpenAI, and select your preferred model
Keep your OpenAI API key secure and never share it publicly. The API key provides access to your OpenAI account and associated billing. If you suspect your key has been compromised, return to the OpenAI dashboard and delete it immediately, then generate a new one.
OpenAI API usage is billed based on the number of tokens processed. Make sure to set up billing information in your OpenAI account to prevent service interruptions. You can monitor your usage and set spending limits in the OpenAI dashboard.
Once configured, OpenAI will be available as an option for generating menu descriptions, item suggestions, and other AI-powered features within QuickDine. Different models offer varying levels of capability and cost, so choose the one that best suits your needs and budget.
Gemini AI Settings
Google's Gemini AI offers powerful language models that can enhance your menu with intelligent descriptions and item suggestions. Follow these steps to integrate Gemini AI with QuickDine:
-
1
Access the Gemini AI Studio: Visit https://aistudio.google.com/ and sign in with your Google account. If you
don't have a Google account, you'll need to create one first.
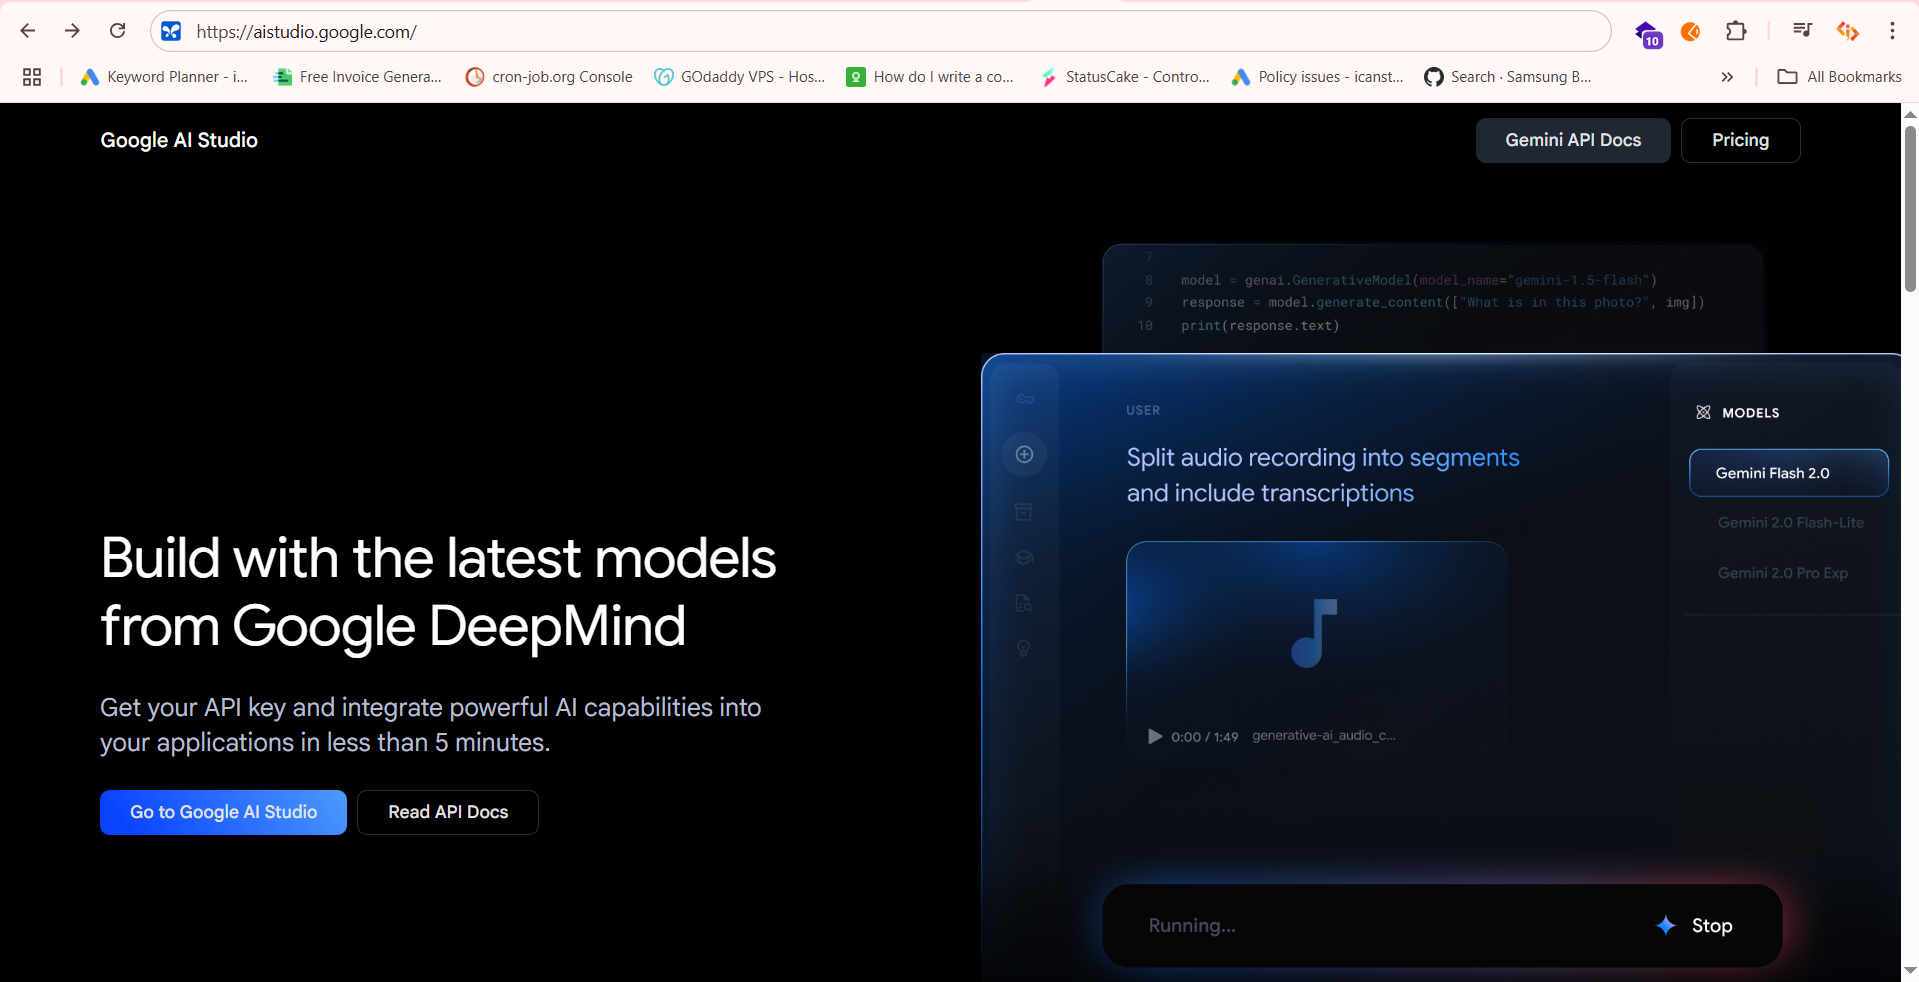
Google Gemini AI Studio homepage
-
2
Navigate to API keys section: After signing in, go to the dashboard and click on
"Create new API key" to generate authentication credentials for your QuickDine integration.

Access the API keys section from the Gemini AI dashboard
-
3
Create a new project or choose existing: You can either create a new project
specifically for QuickDine integration or select an existing project if you already have one set up.

Select an existing project or create a new one for your integration
-
4
Copy and securely store your API key: After creating the key, Gemini AI will
display your new API key. Make sure to copy this key and store it in a secure location as it will
only be shown once for security reasons.
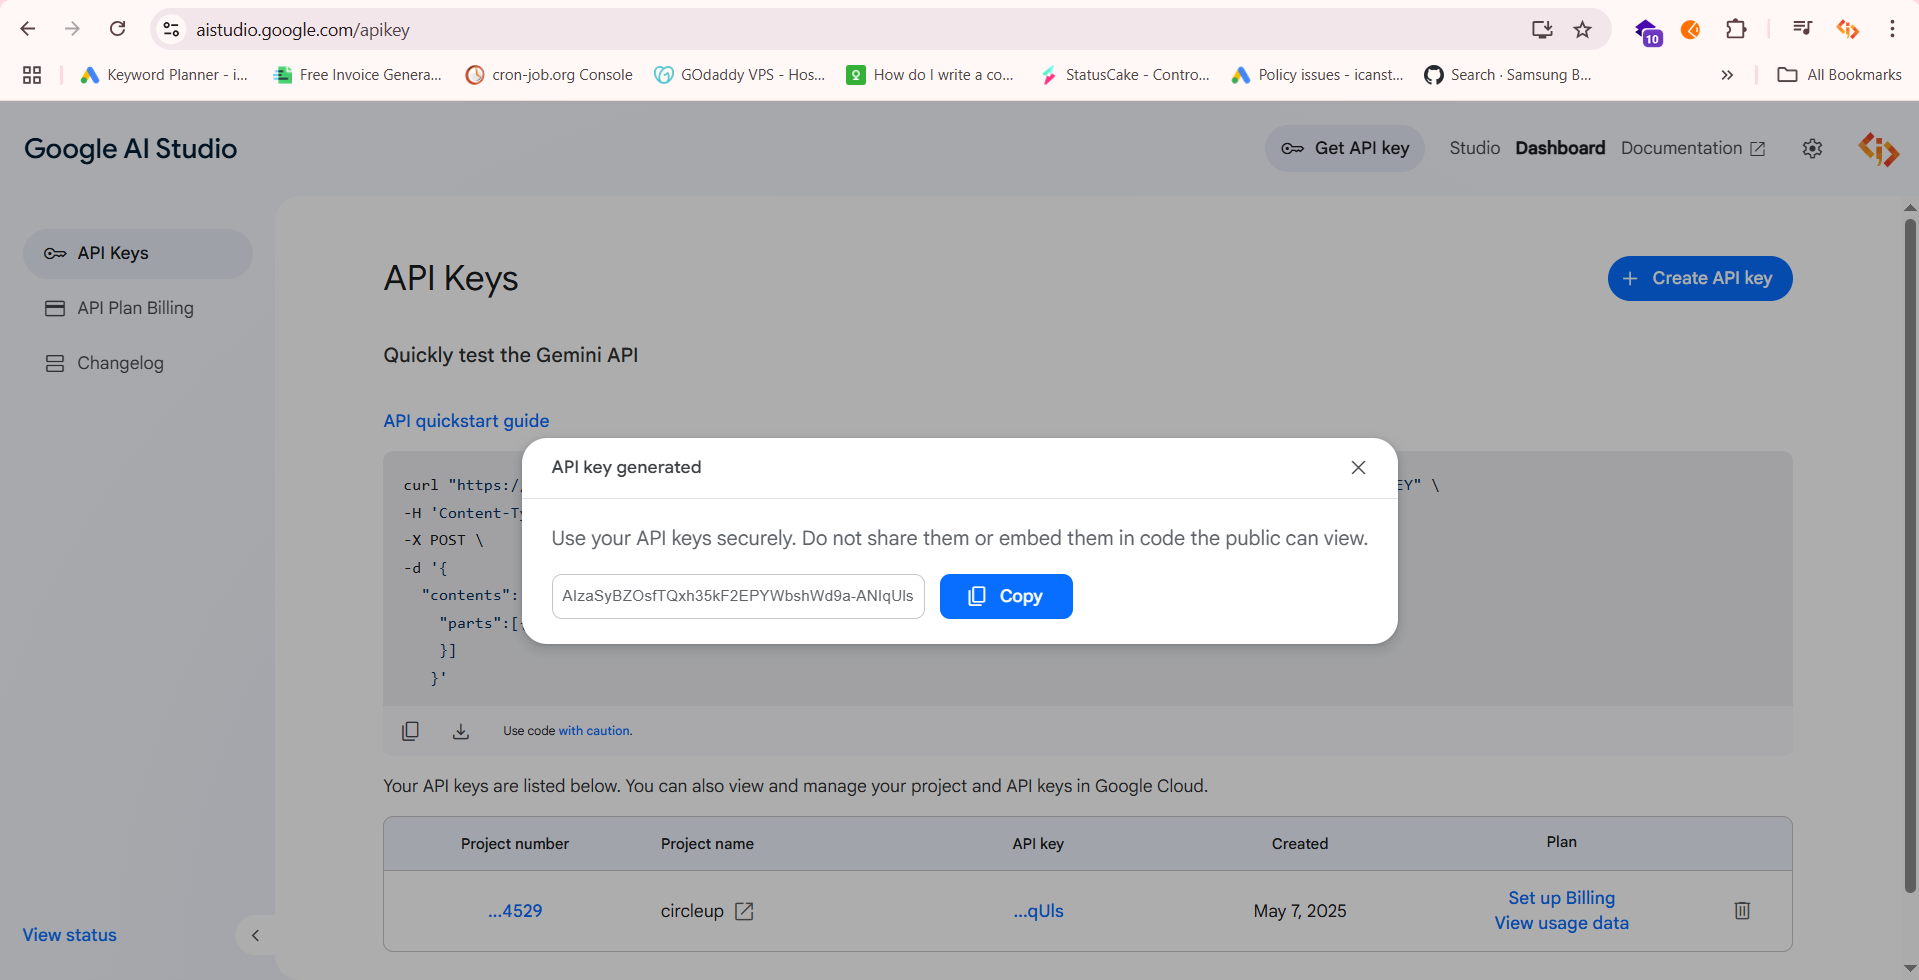
Copy and securely save your generated API key
-
5
Configure Gemini AI in QuickDine: In your QuickDine admin panel, navigate to the AI
Settings section. Paste your Gemini AI API key in the appropriate field, toggle the "Enable Gemini
AI" option, and select your preferred model to activate the integration.
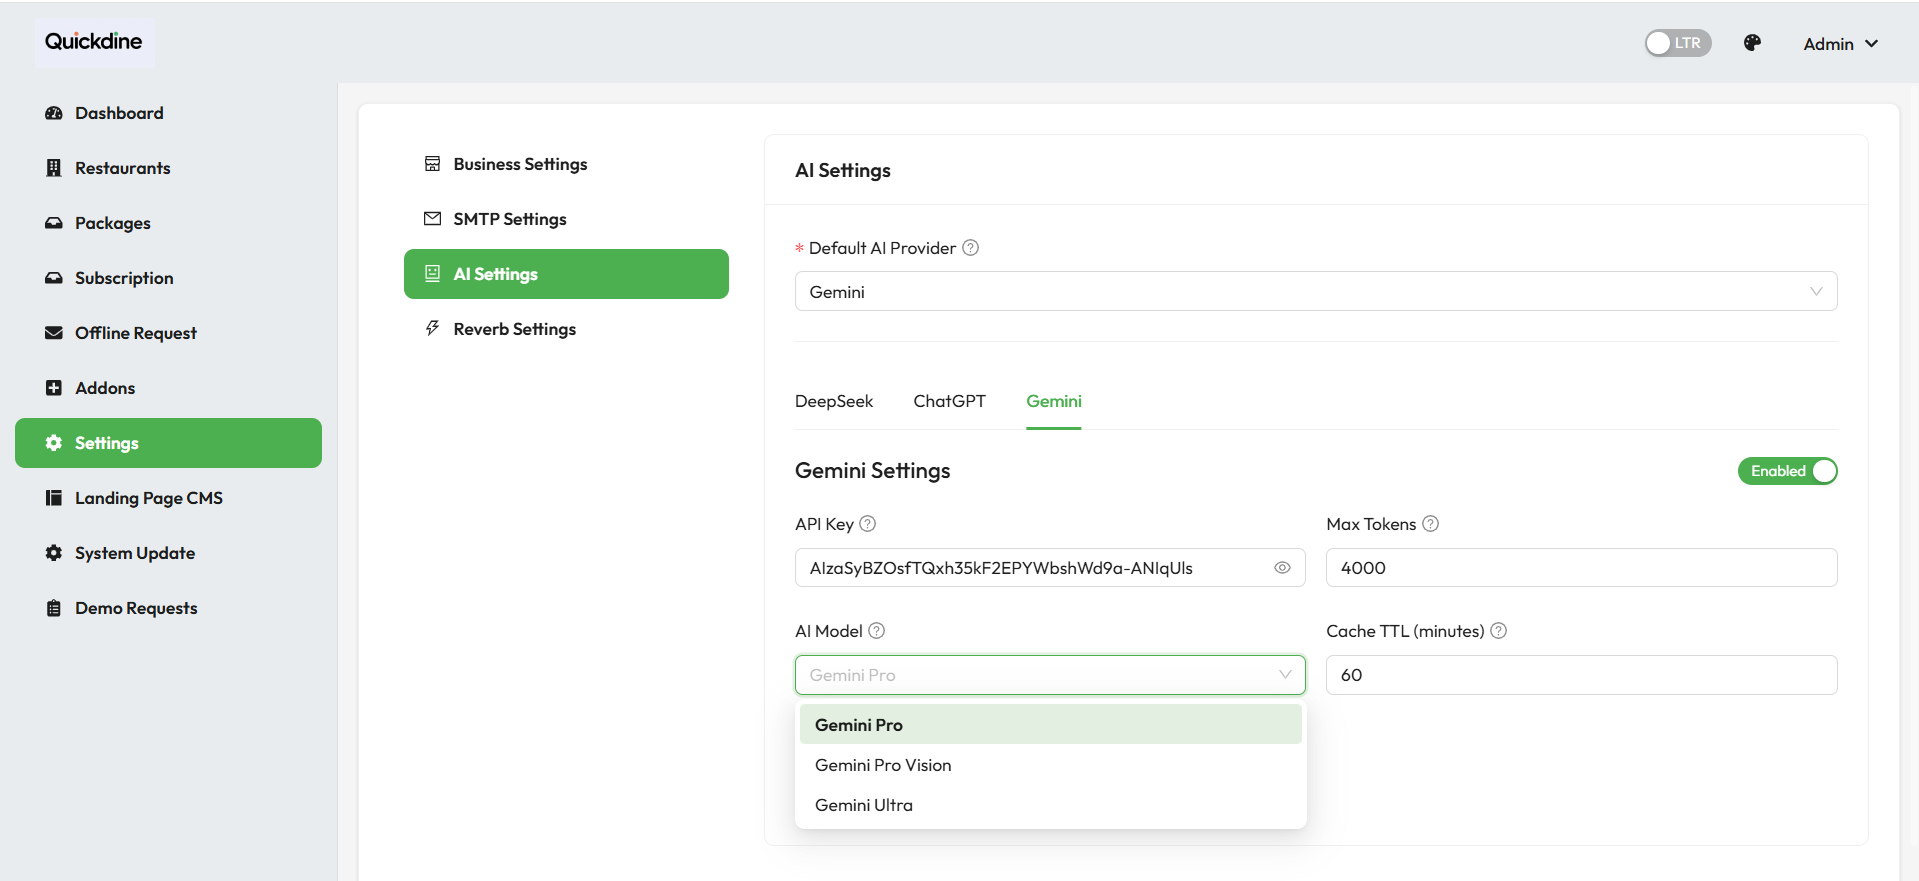
Enter your API key in QuickDine, enable Gemini AI, and select your preferred model
Keep your Gemini AI API key secure and never share it publicly. The API key provides access to your Google Cloud account and associated services. If you suspect your key has been compromised, return to the Gemini AI dashboard and revoke it immediately, then generate a new one.
Google offers a generous free tier for Gemini AI that allows you to process a significant number of requests before incurring charges. This makes it an excellent option for small to medium-sized restaurants looking to leverage AI capabilities without significant upfront costs.
Once configured, Gemini AI will be available as an option for generating menu descriptions, item suggestions, and other AI-powered features within QuickDine. Different Gemini models offer varying capabilities, so choose the one that best suits your needs.
DeepSeek Settings
DeepSeek AI is a powerful artificial intelligence provider that offers advanced language models for generating menu descriptions and item suggestions. Follow these steps to integrate DeepSeek AI with QuickDine:
-
1
Sign in to DeepSeek AI: Go to https://www.deepseek.com and sign in to your account. If you don't have an
account, you'll need to create one.

DeepSeek AI sign in page
-
2
Navigate to API keys section: Once signed in, access your account dashboard and
navigate to the API keys section to manage your authentication keys.

Navigate to the API keys section in DeepSeek dashboard
-
3
Create a new API key: Click on "New API Key" button and give your key a descriptive
name (e.g., "QuickDine Integration") to help you identify its purpose later.

Creating a new API key with a descriptive name
-
4
Copy and securely store your API key: After creating the key, DeepSeek will display
your new API key. Make sure to copy this key and store it in a secure location.
Important: This key will only be shown once for security reasons.
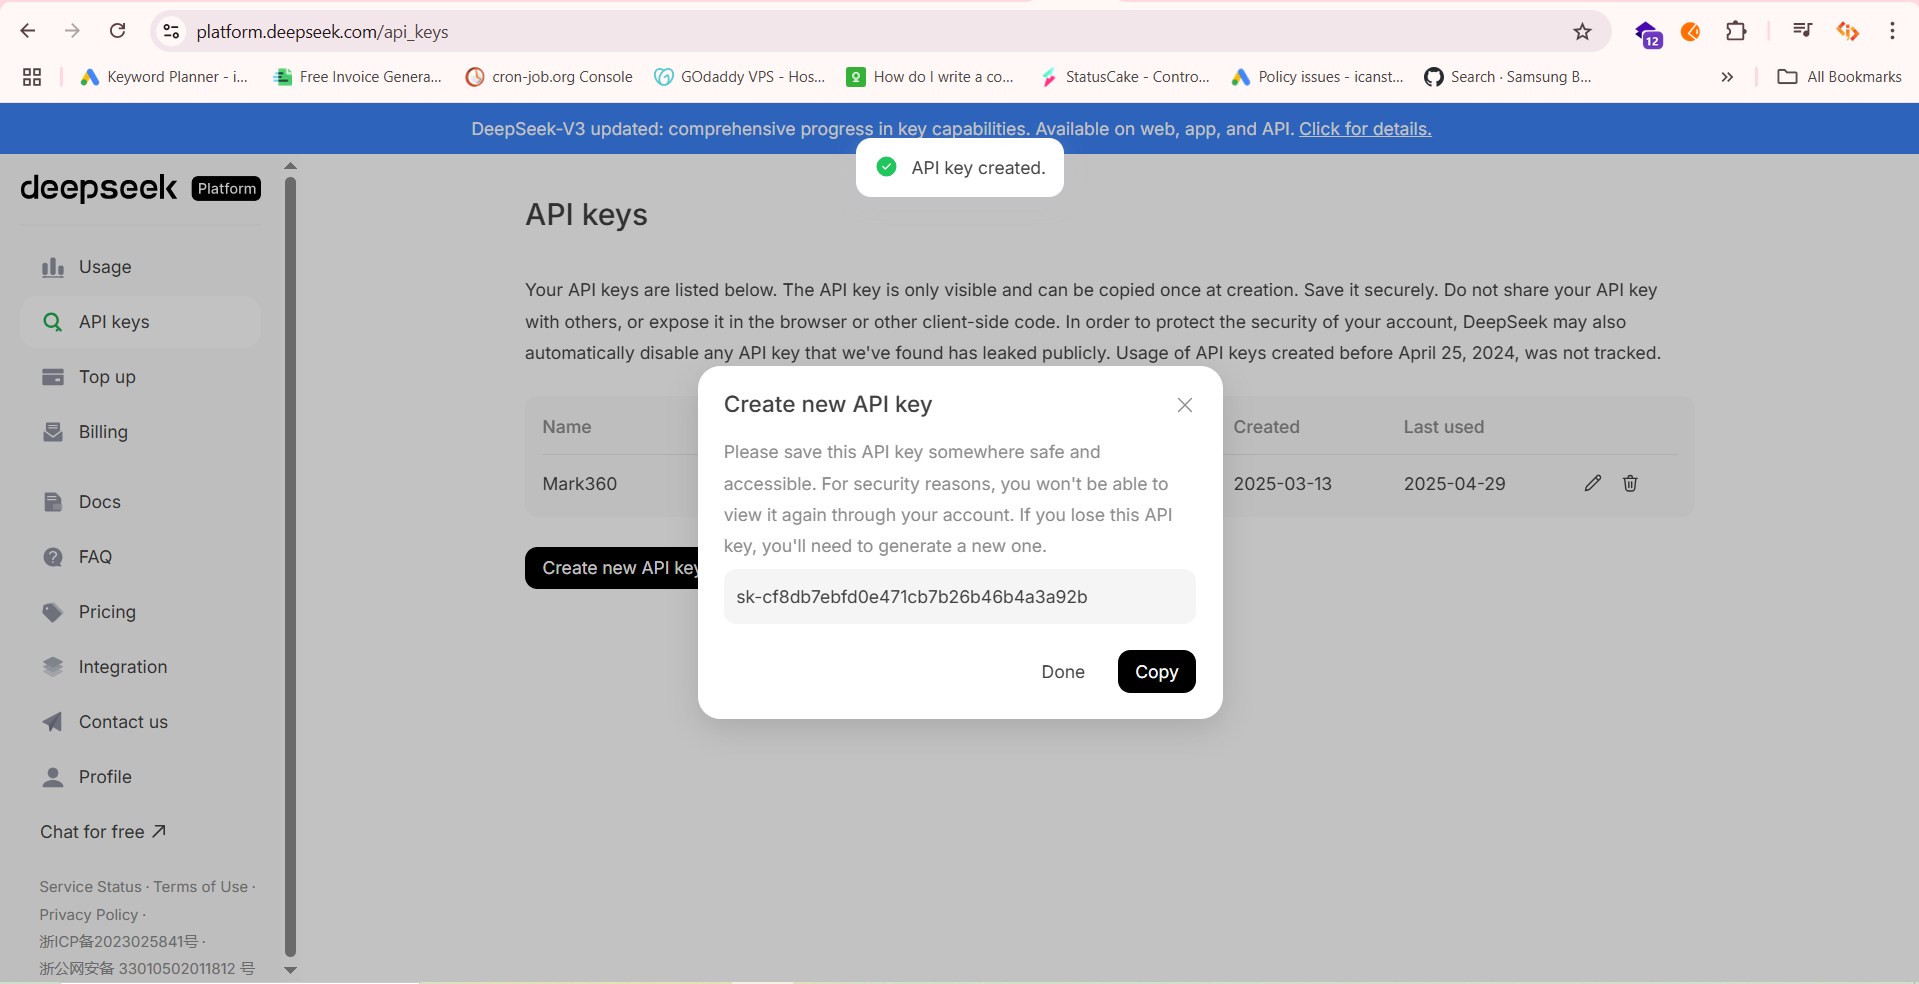
Copy and securely save your generated API key
-
5
Configure DeepSeek in QuickDine: In your QuickDine admin panel, navigate to the AI
Settings section. Paste your DeepSeek API key in the appropriate field and toggle the "Enable
DeepSeek AI" option to activate the integration.
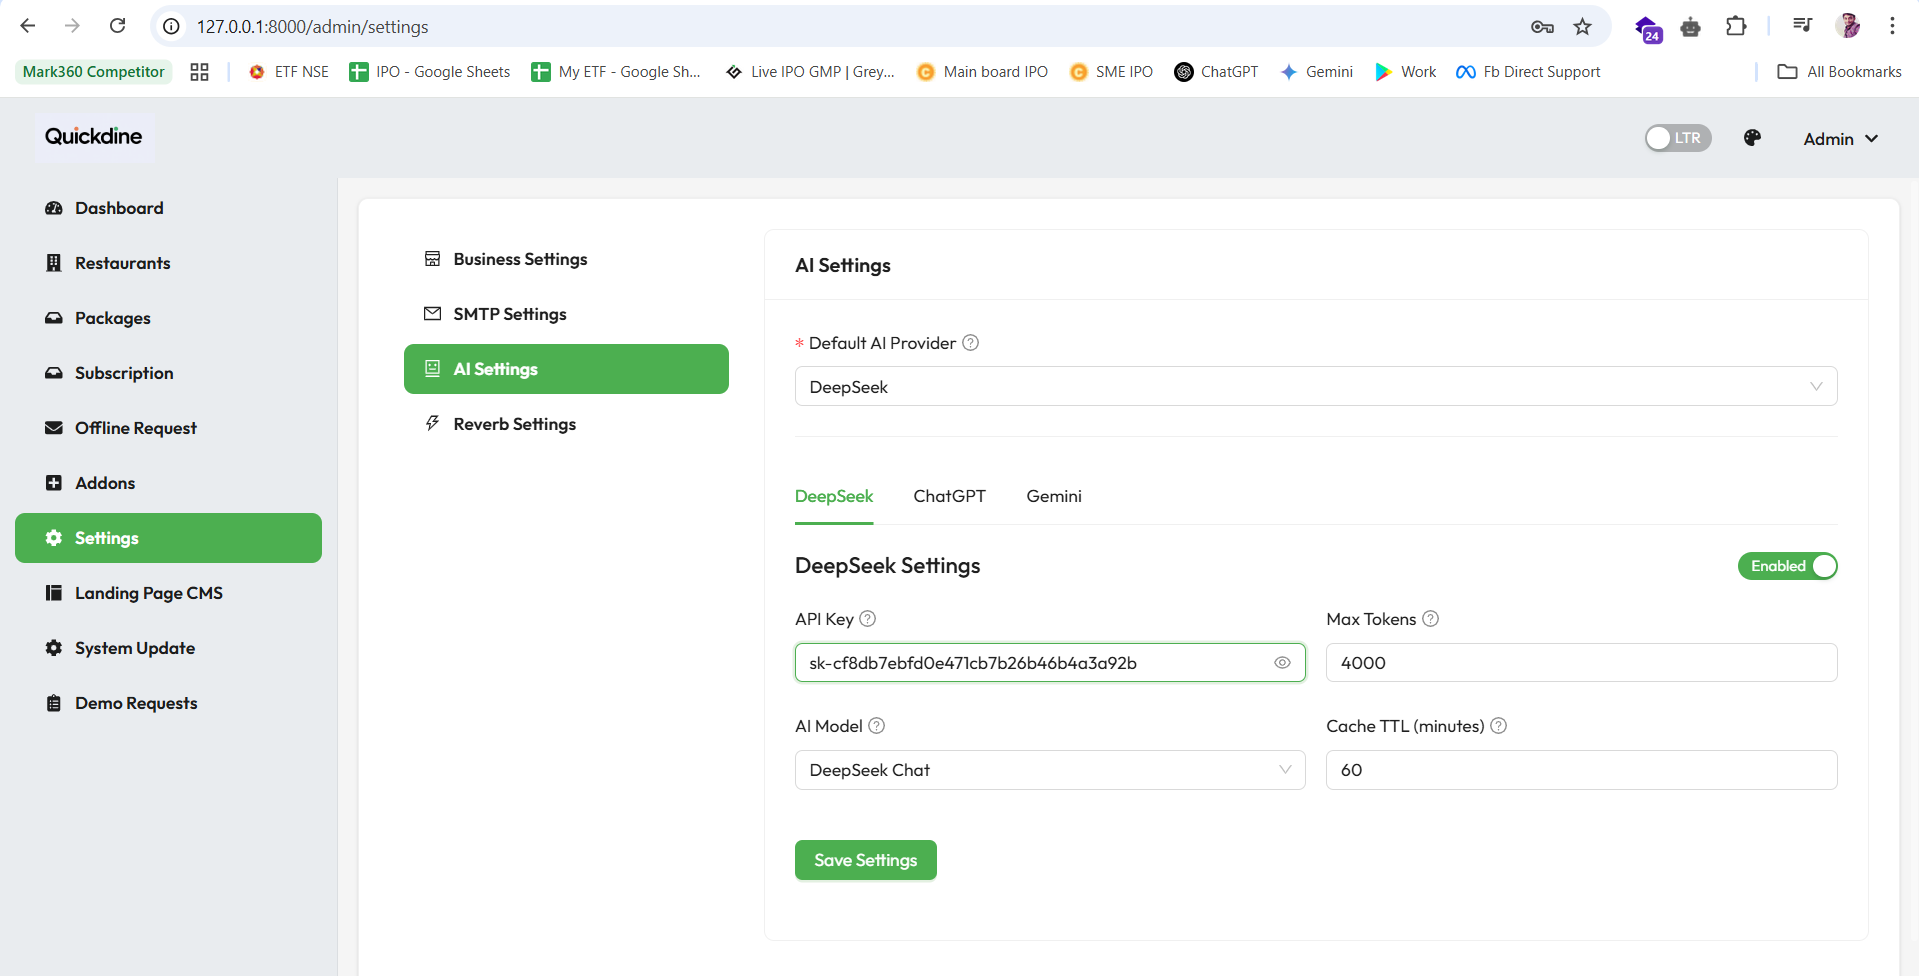
Enter your API key in QuickDine and enable DeepSeek integration
Keep your API key secure and never share it publicly. The API key provides access to your DeepSeek account and associated billing. If you suspect your key has been compromised, return to the DeepSeek dashboard and revoke it immediately, then generate a new one.
Once configured, DeepSeek AI will be available as an option for generating menu descriptions, item suggestions, and other AI-powered features within QuickDine.
Generate AI Menu
QuickDine's AI Menu Description feature enables restaurant owners to generate comprehensive menus tailored to their specific restaurant type, cuisine, and location - all powered by leading AI models including OpenAI, Gemini AI, and DeepSeek.
Follow these steps to generate an AI-powered menu for your restaurant:
-
1
Select Restaurant Locations: Choose the locations for which you want to generate a
menu. You can select multiple locations simultaneously if you wish to implement the same menu across
different branches.

Select one or multiple restaurant locations for menu generation
-
2
Choose Restaurant Type: Select the type of restaurant you operate, such as casual
dining, fine dining, fast food, bistro, café, or others. This helps the AI understand the style and
format of menu items to generate.

Choose your restaurant type to customize the menu style
-
3
Select Cuisine Type: Specify the cuisine style such as Indian, Italian, American,
Mexican, Chinese, or others. This crucial parameter determines the types of dishes the AI will
suggest for your menu.

Select the cuisine type for your restaurant
-
4
Configure Menu Parameters: Enter the following details:
- Menu Name: Provide a name for your menu (e.g., "Summer Special", "Lunch Menu")
- Item Types: Select dietary preferences (vegetarian, non-vegetarian, Jain, eggetarian)
- Menu Description: Add specific details about the menu theme or concept
- Number of Groups: Specify how many menu categories you want (e.g., appetizers, main course)
- Items per Group: Define how many items should appear in each category
- Price Range: Set the minimum and maximum price points
- AI Provider: Select your preferred AI model (OpenAI, Gemini, or DeepSeek)
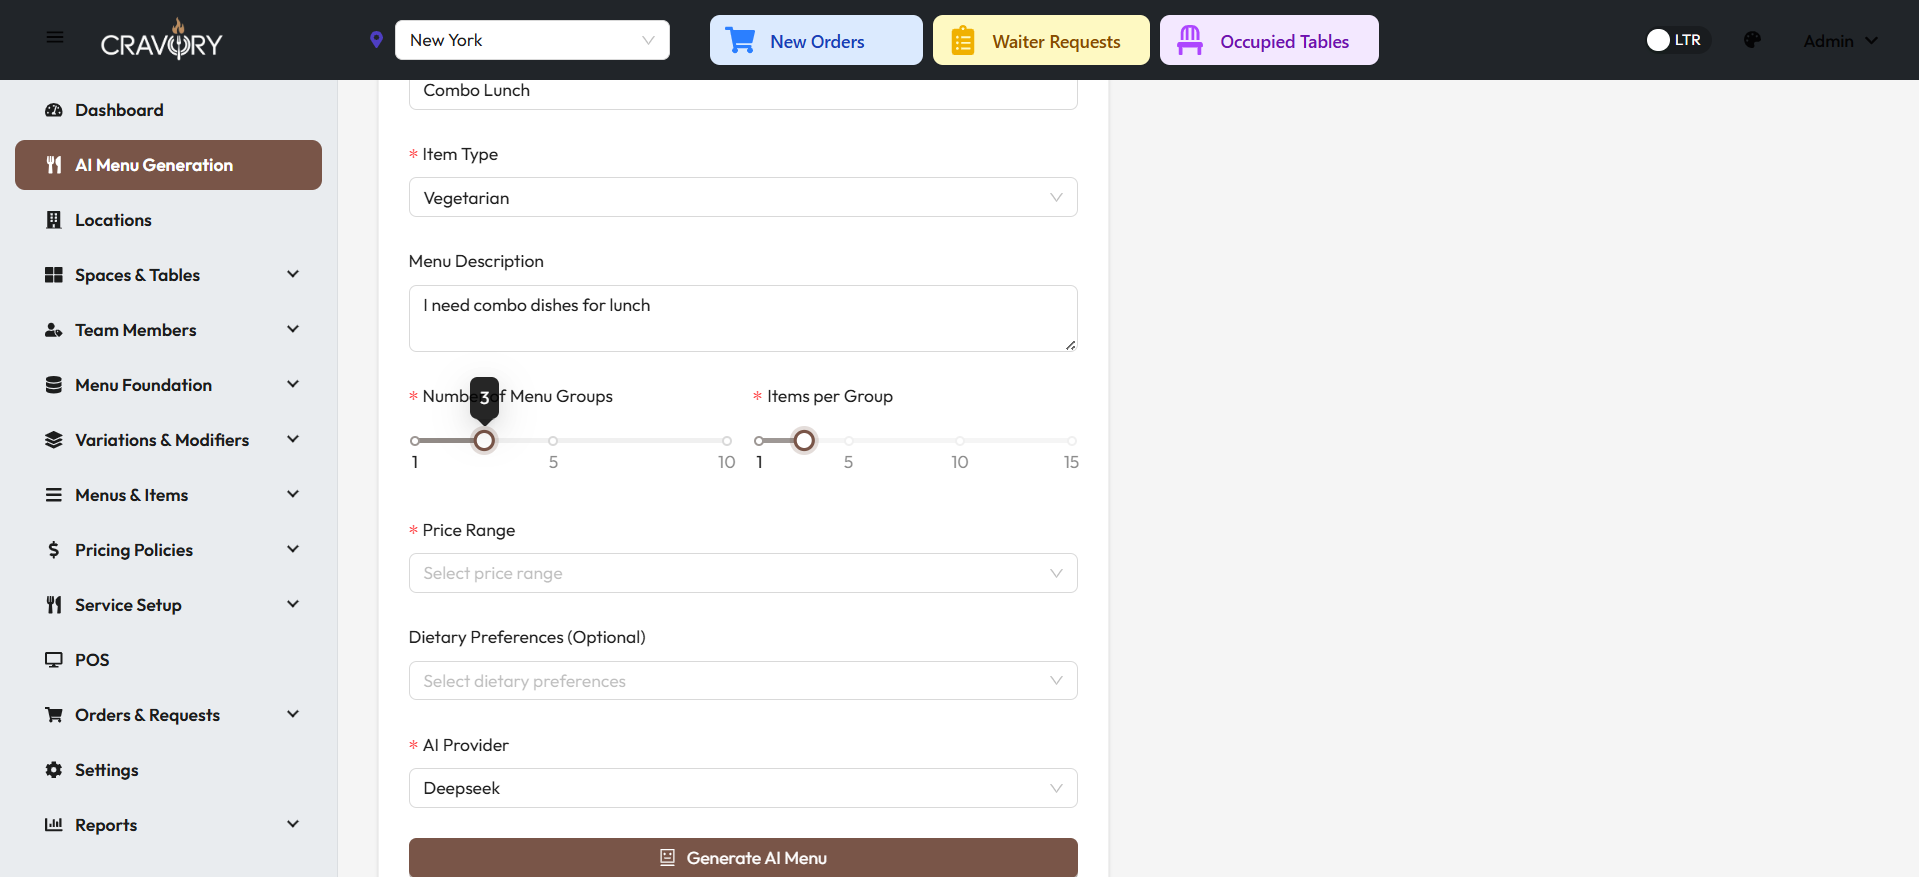
Configure menu parameters and select your preferred AI provider
- 5 Generate AI Menu: After configuring all parameters, click on the "Generate AI Menu" button. The system will process your request and create a tailored menu based on your specifications.
-
6
Review and Import Generated Menu: Once generated, you'll see the AI-created menu
with categories and items. Review the suggestions and click "Import Menu" to add these items to your
restaurant system.
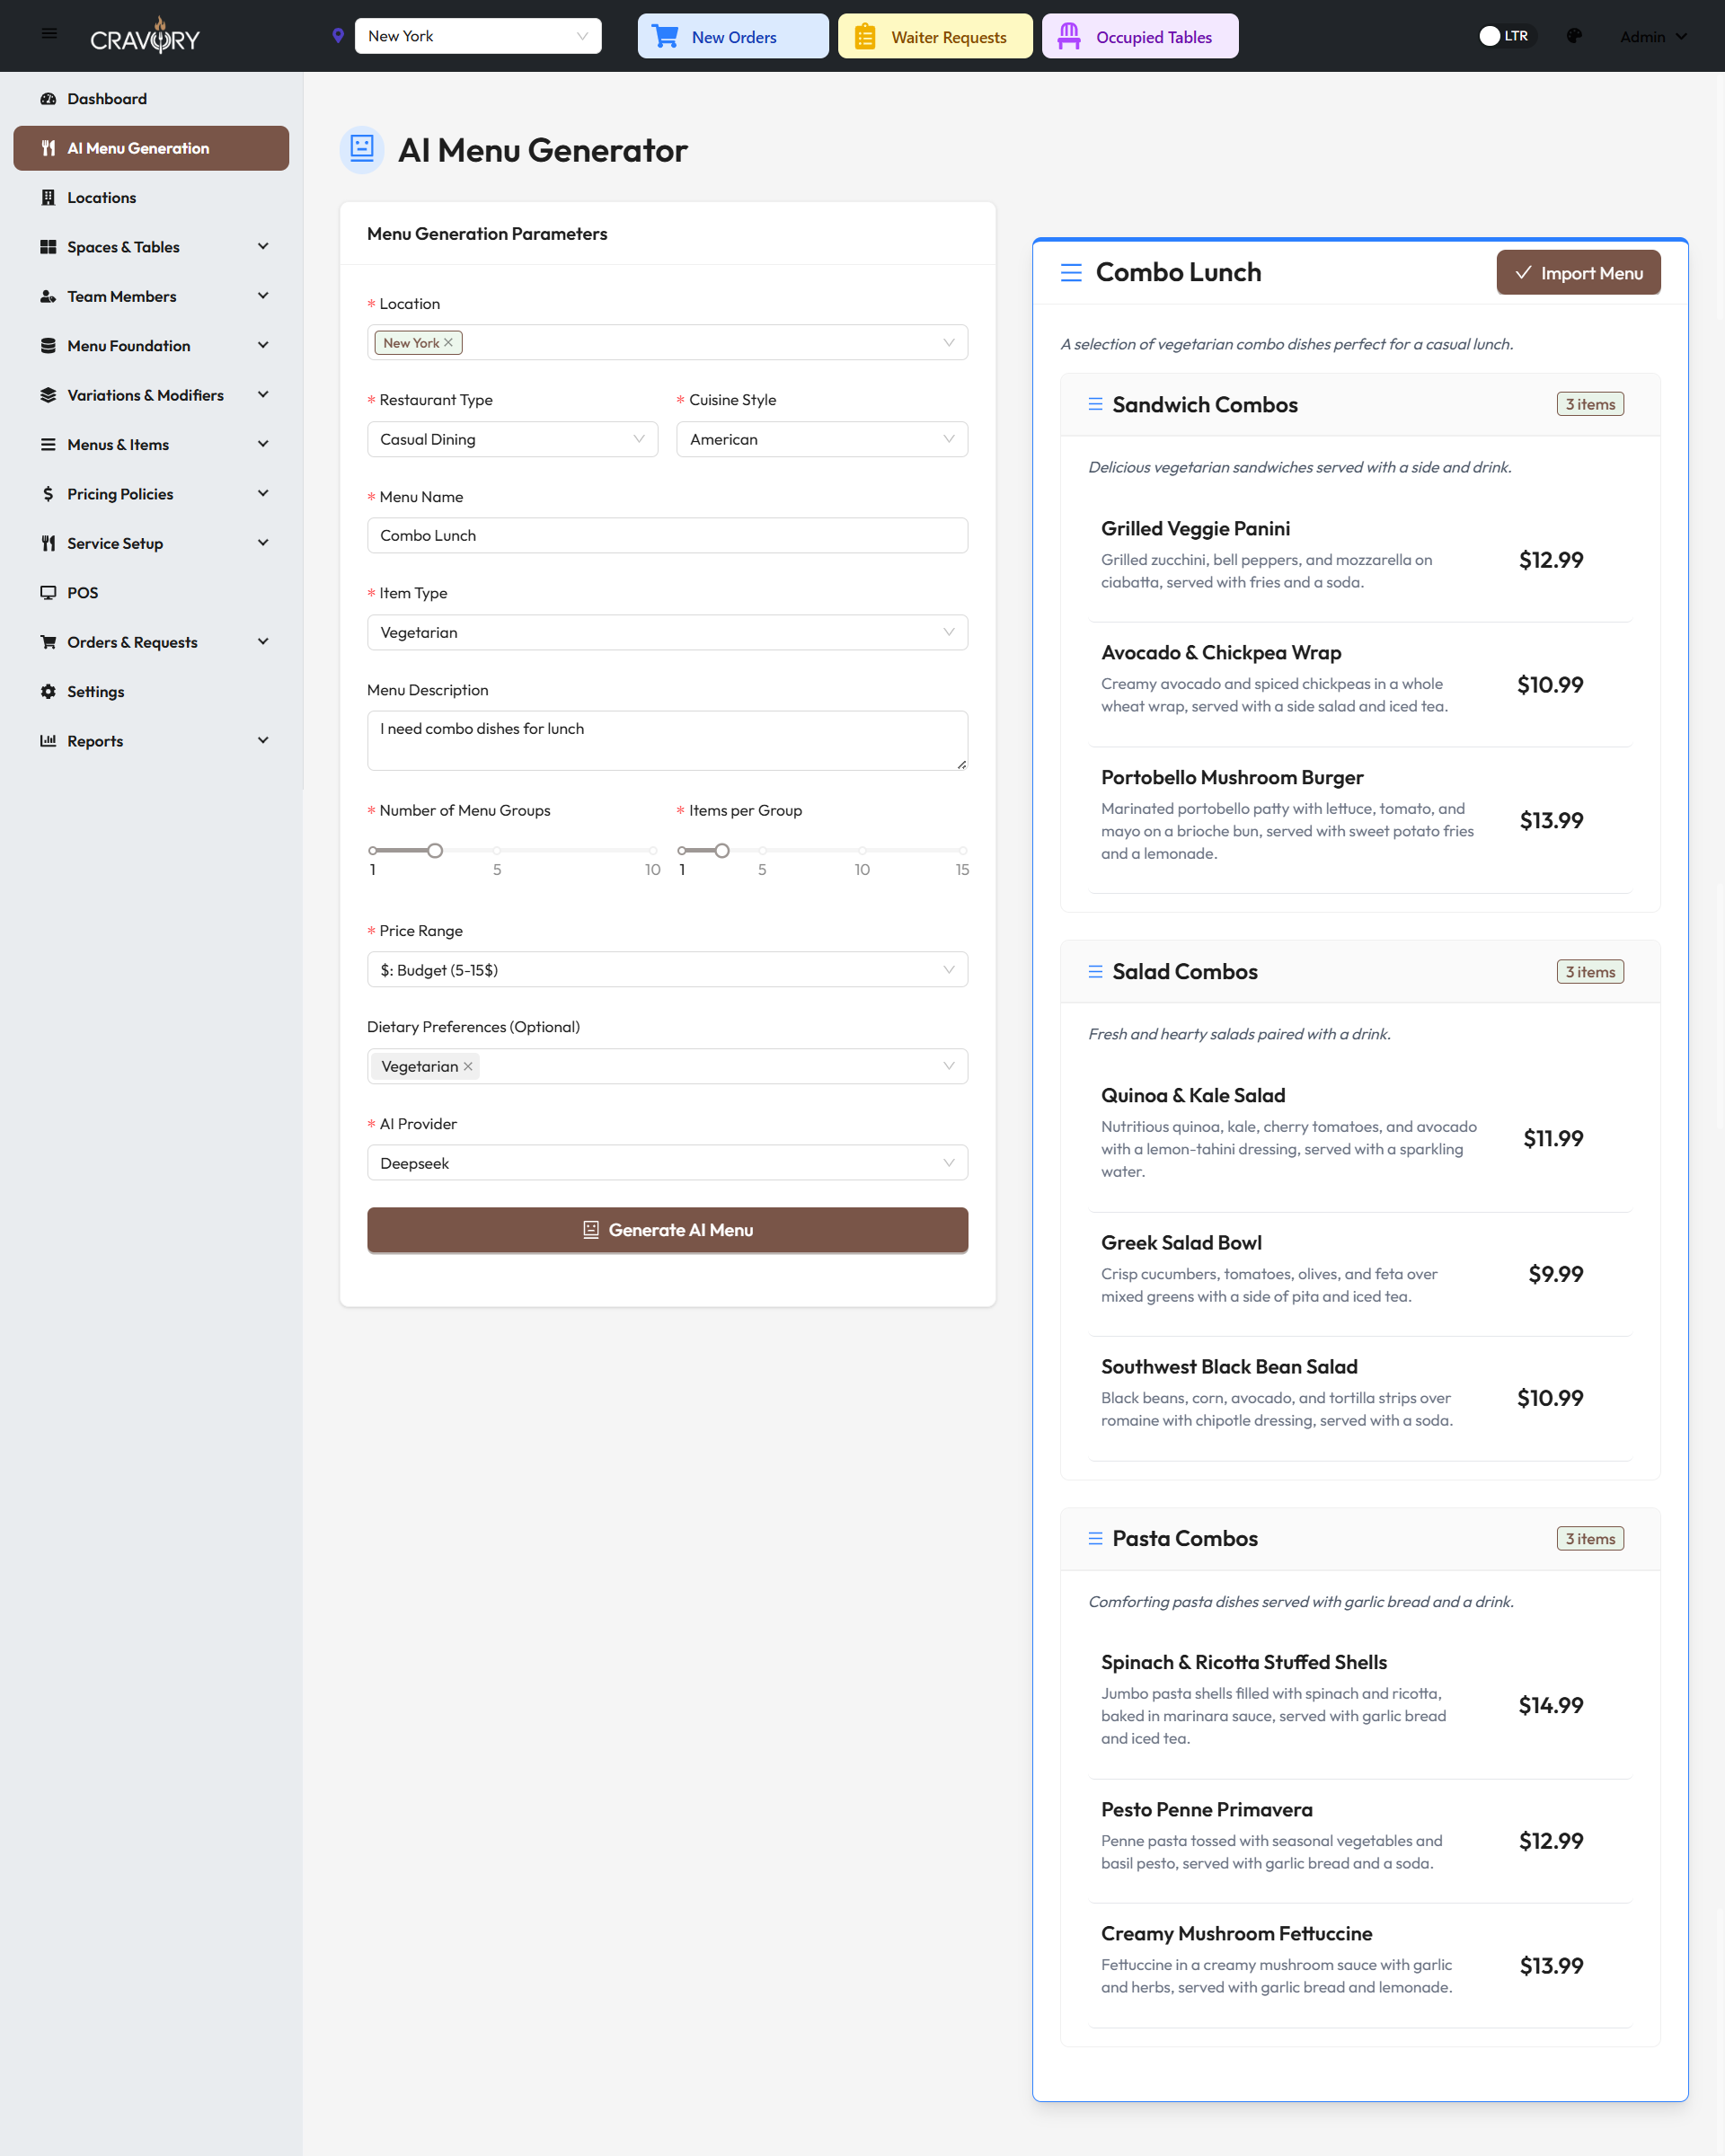
Review your AI-generated menu items and categories
After importing your AI-generated menu, you can further customize any aspect of the menu items including names, descriptions, prices, and images through the standard menu management interface. The AI generation is just the starting point for your creative process.
For best results, provide detailed menu descriptions that mention regional influences, special ingredients, or unique cooking techniques. This helps the AI generate more authentic and distinctive menu items that align with your restaurant's brand identity.
The AI Menu Generation feature significantly reduces the time and effort required to create a professional menu from scratch. It's particularly valuable for new restaurants, seasonal menu updates, or when launching special promotional menus.